Menu Configuration
This chapter explains the menu management of imperia GUI.
The menu administration is done in two areas:
- menu structure, menu items and custom menus are created here in the Configure menus dialog;
- the permissions for these menus are set in the Permissions dialog. For more information on permissions refer to Controller Permissions.
Standard Menu Structure#
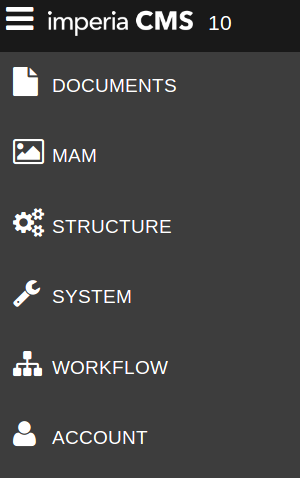
This standard menu structure should be familiar to you when you have already worked with imperia. A menu item can link to functions as Create new document but also to data (e.g. assets), processes (e.g. workflows) or general settings. Or you can use menu items for grouping other (sub) menu items.
The default menu tree contains the following main menu items, arranged in logical groups:
| main menu item | content |
|---|---|
| Documents | Contains menu items to manage documents. Editors should be able to access this menu. |
| Media Asset Management | Leads directly to the Media Asset Management. Media editors should be able to access this menu. |
| Structure | Contains menu items to manage categories, templates and modules. Editors and template designers will want to use this menu. |
| System | All the settings to imperia are done in this menu, including permissions to menus. It is highly recommended that it is made available exclusively to the administration. |
| Workflow | Leads directly to the Workflow dialog to edit existing and create new workflows. |
| Account | This menu contains account settings for each user, like bookmarks management, language settings, etc. This menu should be available for each group. |
Note
A menu item is only visible to groups that also have permissions to the corresponding menu function.
Configure Menu#
The menu tree is created in the dialog Menu->System->Configure menus. All menus and menu items that a company needs are available in this dialog, regardless of permissions. Depending on how the privileges of a group are set, only part of this menus and menu items will be visible to this group. The menu tree in Configure menus is accessible only to users with adopted “superuser” group:
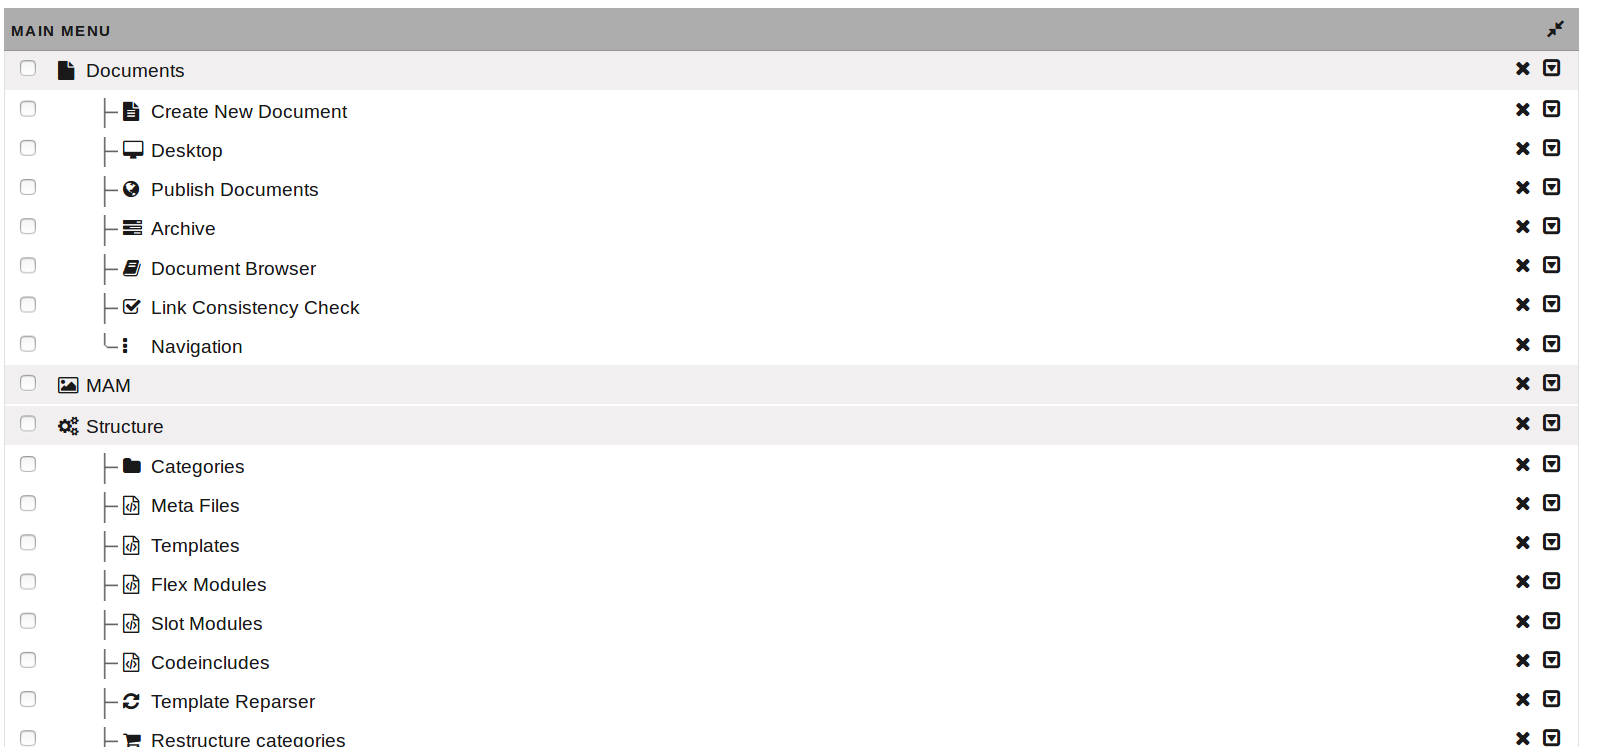
Create new menu item#
You have the option to set the new menu entry either above or below the selected menu item or as an submenu (child item).
- At the right side of the line of the existing menu click on the drop down menu. You have following options, depending on the ordering of the existing menu:
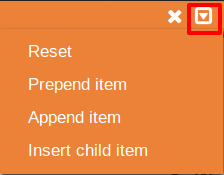
- the option Prepend item adds the new menu item before the selected one.
- the option Append item adds the new menu item below the selected one.
- the option Insert child item adds the new menu item as a new sub menu - as the deepest nesting in the menus is to the second level, this option is only available for first level menus.
- Select the desired option. A new page displays, where you can set the parameters for the new menu item.
- In this page first select, if the new menu item should link to a Controller (this lists all menu functions in imperia) or to a URI (path to a certain function/page). Depending on your selection, the entry fields of the page change slightly:

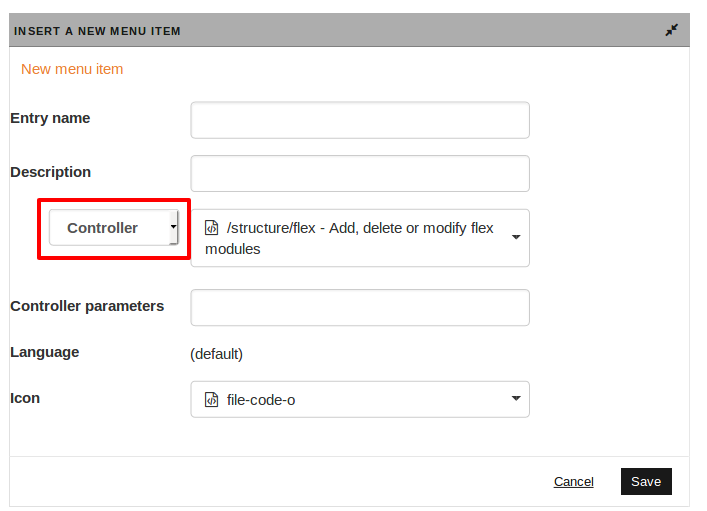
In the following tavel all entry fields and options are described:
| entry field/option | description |
|---|---|
| ID | Enter a string, that has not been used as an ID yet. |
| Entry name | Enter a name that is going to be displayed in the menu. |
| Description | Enter the text that is going to be displayed on the mouse over. |
| URI | Enter the path to the desired page or function (e.g. http://www.imperia-pirobase.com). |
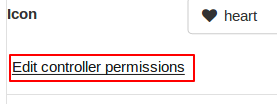
| Controller | When you click into the field, a list of all existing imperia Controller opens (including user-defined ones). This option also adds the link Controller Permissions at the end of this page. This link leads to the menu permissions. |
| Controller Parameters | If you want to add additional parameter for the controller, enter them here. |
| Language | The above entered name and description are specified for the here selected language. If you select a new language, the name and description fields need to be entered again. |
| Icon | You have a variety of options to choose an icon for the new menu item. |
Access Permissions to Menus#
As mentioned above, the link Controller Permissions will be added when choosing the option Controller (not for the option URI) for the new menu item.
By this link, you can set the access permission for the selected controller; proceed as follows:
- Click on the link:
 You will be directed to the menu permissions for editing the permissions of the controller:
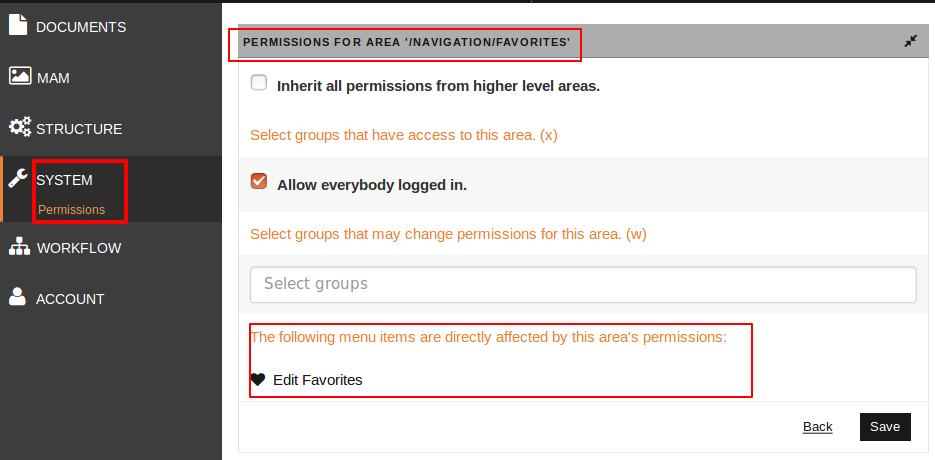
- There, you can set the access permissions as described in Controller Permissions.
- You can also go to directly to the menu, by clicking on the menu item.
Example for a New Menu Item#
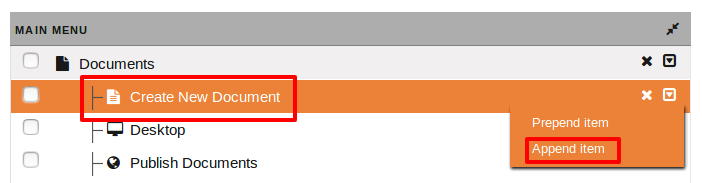
Let's assume that the press releases of a company are always published under the category “News”. In this case it will be convenient to create a menu item that directly creates a document in the appropriate category "Press Release". Then you would proceed as follows:
- Mouse over the Create New Document menu and select Append item from the drop down menu:
-
Enter the parameters as shown in the following:
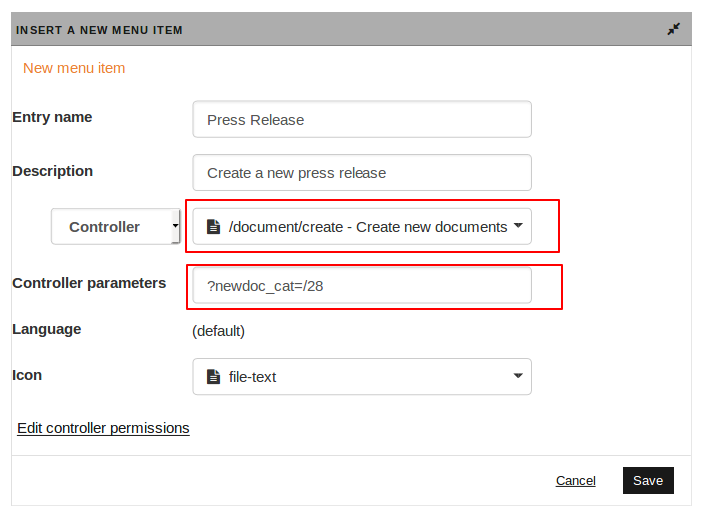
- Next to controller, you see that the newly created controller is specified with the function
document/create. - By entering the controller parameter (in this example
?newdoc_cat=/28) the controller creates a new document in the press releases category.
- Next to controller, you see that the newly created controller is specified with the function
Tip
To find out the appropriate parameter for a function, call a menu item and explore the links that can be followed there. The parameter always begins with ?.
Edit menu item#
Each item in the menu tree can be edited. To access the Menu Item Edit dialog, click on the desired entry. The same dialog opens as described for creating new menu items.
Delete menu item#
You have different options for deleting menu items:

-
Click the button at the right side of the menu's line in order to delete the desired menu item.
-
You can also use the check boxes in order to delete multiple items.
-
You can also use the Reset option. Then, only newly created menu items are removed!
Note
Keep in mind that you remove the menu entry for all groups and thus for all users of a system.