Workflows
imperia offers the possibility to adapt the production process of a document to an existing in-house processes. Each step in a workflow, such as creating, editing, approving, and publishing a document is represented by a workflow step in imperia's workflow.
By default, there are no workflow plug-ins available in the workflow editor. For creating or editing your own workflow, acquire the workflow editor license.
Building a workflow
A workflow is composed of one or more workflow steps, each of which performs a specific operation. Only authorized users can perform such a step. All the necessary information about a document should be collected, as it moves through a workflow.
For instance, the following could be a workflow:
- In the first step, meta information is entered into a new document.
- Then, a workflow step for entering content is defined.
- Another step could include a review of the document by an auditor (or chief legal counsel).
- It could be followed by a step in which the document is converted into a different format (PDF, XML, etc.) or is canceled if it doesn't meet certain terms and conditions.
Each workflow has at least one entry point. Alternatively, several entry points are possible, so that documents from different categories can go through different paths. Which of the available entry points a document takes is set during the category creation.
The individual steps of a workflow are connected to each other and in that way a document can go to them in every possible way. This, for example, includes links that lead back, if the verifier rejects a document because it is incorrect or incomplete. In such a case, a document is returned to a previous step for corrections.
Documents are handled independently in a workflow, so that multiple documents can go through the same step at the same time.
Workflow steps
Each workflow step is realized by a corresponding workflow plug-in. There is a standard set of plug-ins available, after purchasing the workflow editor license. Other customized plug-ins can be purchased, developed on demand or created by yourself with the workflow API.
Each workflow step has at least one data input and one data output. The output of a workflow step is connected to the input of the next workflow step, resulting in a documents' movement through a workflow.
A data output which is not connected to the input of another workflow step, automatically functions as an end to a workflow or workflow branch. Documents that go through such a step leave the workflow.
There is only one way for data output from a workflow step. Multiple outputs can be realized by using a switch on which a document is duplicated.
Managing Workflows#
In the workflow manager, workflows can be created, modified and deleted.
To open the Workflow Manager go to Menu -> Workflow.
The following dialog opens:
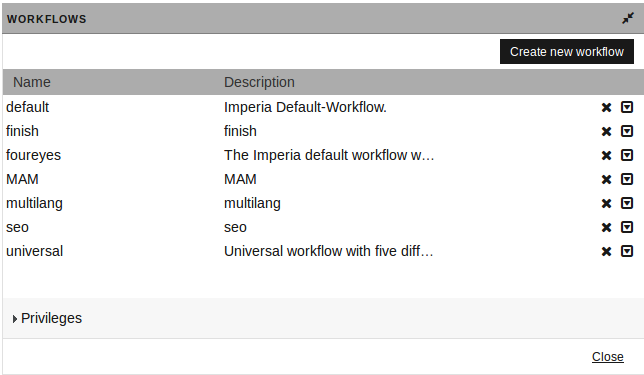
The dialog contains following sections:
Button Create new workflow
Workflow list
This is a list of all available workflows. It contains the Name and Description of every workflow. Additional options are available on the right of the line. Also, if the Privileges section is expanded, a checkbox appears in front of every workflow.
Privileges
Furthermore, the permissions to a workflow are managed via the Privileges section of the dialog (this section is collapsed on load).
Set the read and modify permissions for different groups here.
Creating a New Workflow#
To create a new workflow, proceed as follows:
- Open the Workflow Manager under Menu -> Workflow.
- Click on the Create new workflow button. The following dialog opens:
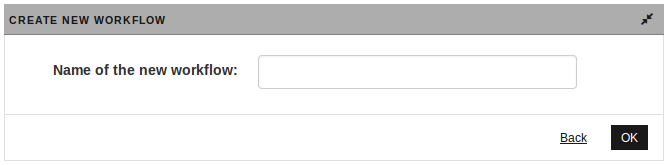
- Enter the name of the new workflow. The name can only contain letters, numbers, minus sign and underscore (_).
- Click the OK button.
This starts the Grid, where the new workflow is created and stored.
Changing Permissions to a Workflow#
There are two ways to change permissions to a workflow:
Possibility 1
-
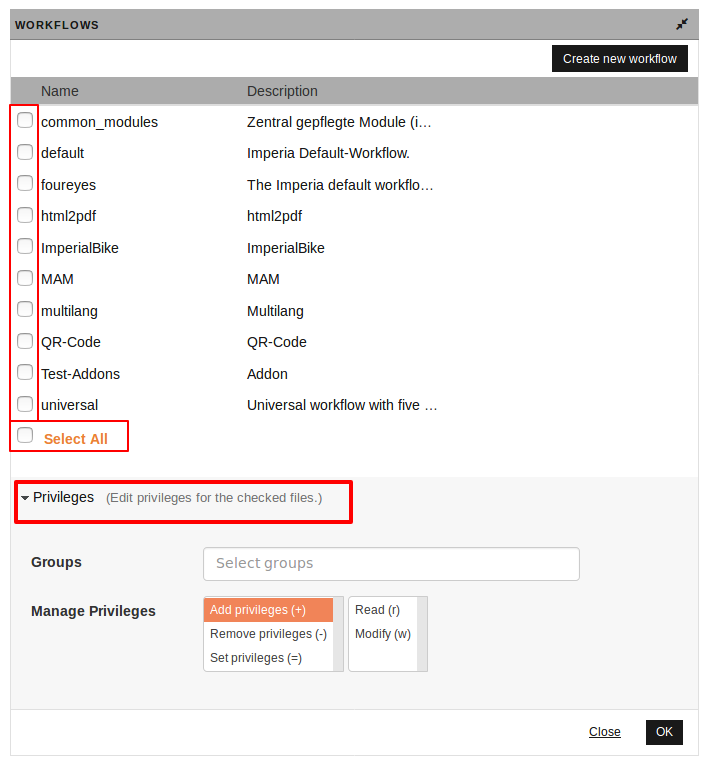
Open the section Privileges in the Workflow Manager.
-
Select the desired workflow(s) by activating the checkbox(es) or activate Select All.
- In the section Privileges, first choose the groups by clicking in the field.
- Then modify their privileges by adding, removing, or setting privileges.
- Click OK to save your settings.
Possibility 2
- Select the Chmod option from the drop down menu at the end of the line of a worklfow, see following figure:
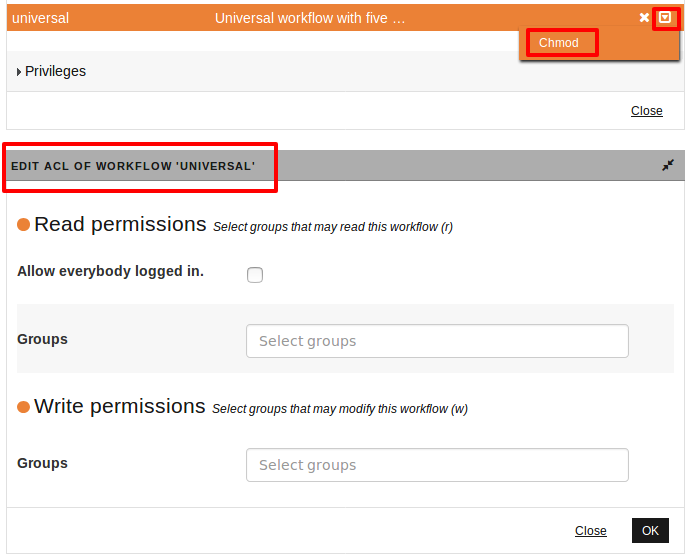
- There, you can change the read and write permissions for one or several groups.
- Click OK to save your settings.
Editing a Workflow#
Workflows are edited in the Grid. Proceed as follows:
- Go to the Workflow Manager under Menu -> Workflow.
- Click the workflow you would like to edit.
This opens the Grid, where the workflow can be edited.
For more information about how to operate with the Grid, refer to The Grid.
Important
Changes to a workflow only affect documents created or re-imported from the archive. Documents that are already within a workflow are not affected.
In some cases the Hermes daemon has to be restarted in order to activate the changes. This is true for every workflow that involves the Hermes Daemon in some way. For example, for automated import workflows.
Deleting a Workflow#
To delete a workflow, proceed as follows:
- Go to the Workflow Manager under Menu -> Workflow.
- At the end of the line of workflow, click .
- You are prompted for confirmation. Click OK to finish the deletion or Cancel to cancel it.
The Grid#
The Grid is an HTML5 Application that allows you to create and manage workflows in imperia. The HTML5 Grid does not require any additional browser plug-ins to work and it is supported by all modern browsers:
The user interface of the Grid is divided into the following components:
-
Toolbar and
-
Canvas (see Grid Usage for description)
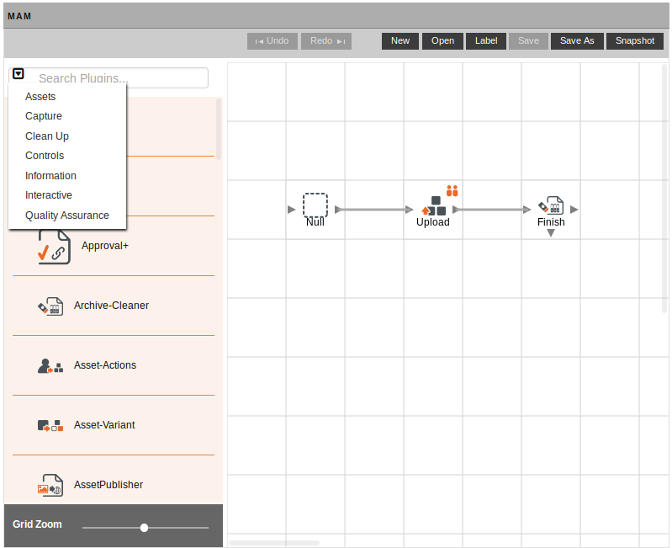
Plug-in Menu#
On the left side of the grid there is the plug-in menu.
The plug-in menu contains all available plug-ins, after purchasing the workflow editor license. Every plug-in has an icon. You may also search for plug-ins, using the incremental search, which allows for errors in the spelling. Also, plug-ins are categorized and you can see the individual groups, using the  drop down menu.
Toolbar#
The different buttons for file operations are located in the toolbar. There are buttons for the following options:
| Button | Description |
|---|---|
| Save | Saves the changes to the current workflow. |
| Save as | Saves the current workflow under a new name. |
| Open | Returns to the workflow manager. See Editing a Workflow. |
| New | Opens the Create new workflow dialog. See Creating a New Workflow. |
| Label | Opens a dialog, in which the Label and Description of the current workflow can be changed. |
| Snapshot | Allows you to export a .png file of the current workflow. |
| Undo | Use this button to undo a previous change. On mouseover you will see a hint with the action that will be undone. |
| Redo | Use this button to redo a previous undo. On mouseover you will see a hint with the action that will be redone. |
Grid Usage#
On the canvas (grid) you create the workflows that contain different workflow steps. Workflow steps are represented by workflow plug-ins that you see in the plug-in list on the left of the Grid. For more information, refer to Workflow Plug-ins.
You can also pan the entire canvas, by holding the right mouse button and move the mouse.
In the following you will be shown how to use the grid in order to create a workflow with the workflow-plug-ins.
Adding a Workflow Step#
-
To add a new step to a workflow drag and drop the desired plug-in from the plug-in bar to the canvas. A workflow step can be dropped anywhere on the canvas.
-
A workflow step may be added more than once to the workflow, if required.
Connecting Workflow Steps#
- By connecting workflow steps, you create the path of the workflow a document goes through.
- The steps can be interconnected using the mouse.
- The plug-in icons have arrows that show where the data input and output are. Drag the gray line to connect the data output of one workflow step with the data input of another.
Moving a Workflow Step#

-
Workflow steps can be moved within the canvas via drag and drop.
-
Existing connections are preserved.
Disconnect Workflow Step#
If an incorrect connection is established, it can be either deleted or replaced by another connection:
-
To delete a connection use the right mouse button to open the context menu, where there is a Disconnect option.
-
To replace a connection, use the same data output that uses the wrong connection and connect it with the correct input. When the mouse button is released, the old connection is replaced by the new one.
Deleting a Workflow Step#
-
Deleting a selected workflow step is done via the Delete key or using the Delete option of the context menu.
-
If a workflow step is deleted, the existing connections to other steps are removed.
-
You can also select several plug-ins in order to delete them simultaneously.
Setting the Properties and Access Permissions of a Workflow Step#
Properties
The settings of the properties can be very different for each workflow-plug-in. Also, some plug-ins do not require any further configuration. Read more about the configuration options of the individual plug-ins in Workflow Plug-ins.
Access Permissions
For many of the workflow steps it is possible to define which groups can access them. All users, who can assume that group, will have access to documents that have reached the respective workflow step.
Users that have no permissions to a certain workflow step, won't be able to see documents, that have reached it, on their Desktop. For each workflow step there has to be at least one group that has permissions to it. In practice, if users have access only to the Edit workflow step, they will see a document only when the previous workflow step is finished. The document will disappear from their Desktop, as soon as they move the document to the next workflow step (for example the Approval step). Then the document will appear on the Desktop of users, who are allowed to access the next workflow step.
Note
- The permissions set in the workflow step overrule the permissions set in a category.
- For non-interactive plug-ins you don't need to set any access permissions as there is no input required from the user.
Example A user of the group Editor has access only to the workflow step Edit. As soon as she finishes this workflow step, the document disappears from the Desktop. However, the document then appears on the desktop of the user of the group Editor-In-Chief who will execute the next workflow step Approval.
To set the properties/access permissions of a workflow step, proceed as follows:
- In the canvas, double-click on the workflow step whose properties you want to set.
You can open the following properties also by right-clicking the workflow step and choosing the option Edit.
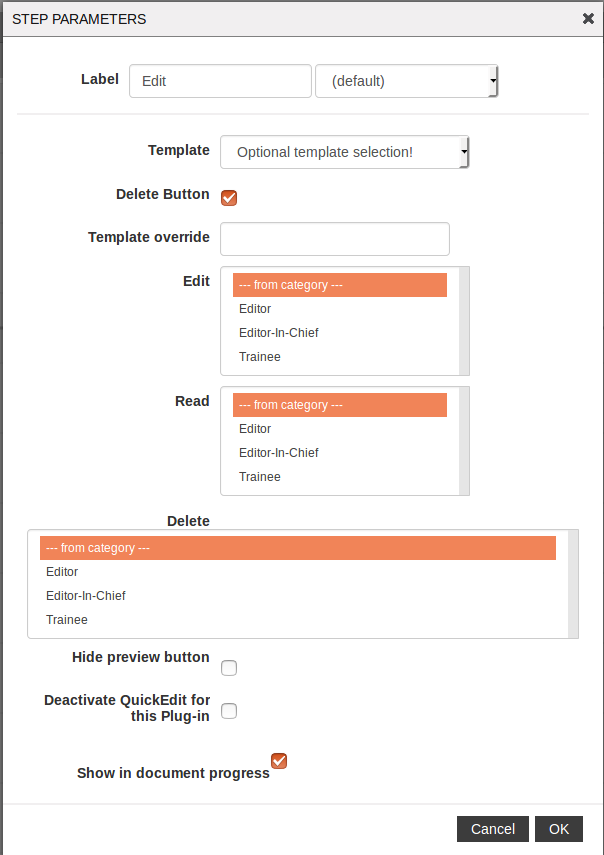
It will open the Parameters dialog. The following figure shows an example of the dialog box for the Edit plug-in:
-
You can set three different permissions to a workflow step:
Permission Description Edit Groups that have access to the workflow step with the permission Edit are allowed to edit the document that has reached the current workflow step. Read Groups that have access to the workflow step with the permission Read are allowed to read the document that has reached the current workflow step. Delete Groups that have access to the workflow step with the permission Delete are allowed to delete the document that has reached the current workflow step. - In each section, you can select the desired group(s) to set their access permissions.Use Ctrl+Shift to select several groups.
- The option from category (default setting) applies the settings of the category.
- When activating the checkbox Show in document progress (activated by default) the workflow step will be displayed in the Desktop.
- Click OK by the end of the dialog to save your settings.
Migration from Java-Grid to HTML5 Grid#
With the introduction of the HTML5 Grid, the step forms are built using plain HTML. Any user-specific step forms need to be migrated from the old FXML format to HTML. To do that, you should use the /site_migrate_fxml_to_html.pl script. Each custom plug-in has to be migrated separately.
Migration
Let's say you have a custom plug-in MyCustomPlugin.fxml.
- Install the Perl modules - XML::LibXML and XML::LibXSLT.
-
Run the migration script, specifying the plug-in to be migrated and the location it has to be migrated to (the code below is wrapped for representation purposes):
./site/bin/site_migrate_fxml_to_html.pl *imperia*/fx2/resources/forms/MyCustomPlugin.fxml > site/view/imperia/default/controllers/structure/workflow/step/mycustomplugin.html -
Repeat the procedure for all your custom plug-ins.