Workflow Plug-ins
In this chapter you will find an alphabetically sorted list of all workflow plug-ins that you receive when purchasing the workflow editor license.
Standard settings#
The licensing of this workflow API allows you to customize the default workflow plug-ins or add your own plug-ins.
Access permissions
For most plug-ins you can configure which group has access permissions to. For more information on workflow plug-ins' access permissions, refer to Access Permissions to Workflow Steps.
Interactive
A basic distinction between workflow steps is whether they are interactive or non-interactive plug-ins. You can define some of the workflow plug-ins as (non-)interactive:
-
Interactive plug-ins expect user input, e.g. Edit + workflow plug-in.Interactive plug-ins have an additional
 on their icons.
 -
Non-interactive plug-ins are automated and do not require user input (i.e. e.g. Annotate).
Configuration of the plug-ins
Furthermore, some plug-ins have to be configured in order to be used. With interactive plug-ins this means mainly setting the permissions. Non-interactive plug-ins have very different settings.
The configuration of all plug-ins are set in their parameters.
- Open the parameters by right-clicking the plug-in so that the sub menu opens:
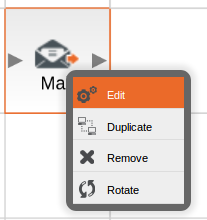
- Select the option Edit to open the configuration of the workflow plug-in. The configuration of each plug-in will be described in the list below.
Show in document progress (Checkbox)
In the parameters of some plug-ins, it is possible to display the workflow plug-in in the document's progress in the Workflow Manager on the Desktop. Also, workflow plug-ins relevant only to the document's author can be displayed in the document progress. For more details, refer to Displaying the Document Progress in the programmers manual.
 Annotate#
This plug-in automatically creates a history record from any text. A document that is processed by the plug-in receives the same history entry. The text of the history entry is specified in the plug-in's configuration in the input Text History.
Configuration
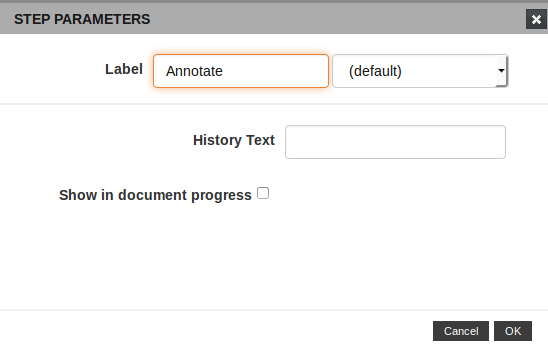
Text History
Enter the text to be written in a document's history as that document reaches this workflow step.
Show in document progress
If the checkbox is selected, the workflow step will appear in the document progress in an imperia template. See also Displaying the Document Progress in the programmers manual.
 Approval#
This plug-in is used to audit documents. Both outputs of the approval plug-in must be connected to other plug-ins, so that documents, depending on whether a user approves or rejects them, take a different path through a workflow.
The southern exit is used when a document is not approved, the eastern output is used if permission is granted. If the plug-in's southern output is not connected a warning is displayed, since in such a case, a rejected document can appear in the Publishing list.
Configuration

The plug-in has the following configuration options:
Approve
groups with this permission can approve or reject a document.
Read
Select which groups can view documents that are in this step, on their Desktop. Note that only groups that have the “Approve” permission can execute the step.
Delete
This permission allows for approved documents to be deleted from the Desktop.
Show in document progress
If the checkbox is selected, the workflow step will appear in the document progress in an imperia template. See also Displaying the Document Progress in the programmers manual.
Read also Approving Documents in the user manual.
 Approval +#
This plug-in is a combination of the link-check function, available over the Desktop, and the Approval plug-in.
Configuration
In the configuration you can define the groups that are allowed to carry out the plug-in:
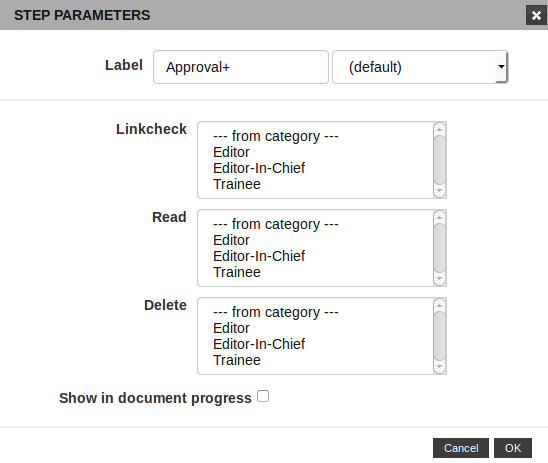
- Linkcheck: groups with this permission can approve or reject a document.
- Read: select which groups can view documents that are in this step, on their Desktop. Note that only groups that have the “Linkcheck” permission can execute the step.
- Delete: this permission allows for approved documents to be deleted from the Desktop.
- Show in document progress: if the checkbox is selected, the workflow step will appear in the document progress in an imperia template. See also Displaying the Document Progress in the programmers manual.
When you carry out the workflow step, the Link-Checker dialog opens:
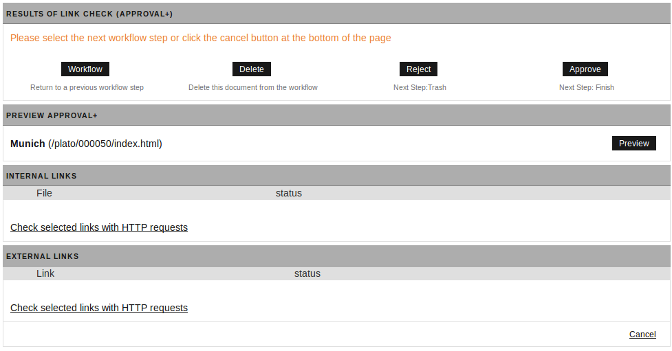
Results of link check (Approval +)
In this section, a user with the appropriate permissions decides what to do with a document.
Approved documents leave the workflow step through the east exit and go to the next step. Rejected documents leave this step to the southern exit.
Internal/ External links
This section displays the results for internal/external links verification. The files listed are linked so that they can be called in a browser. There is a checkbox in front of each file so they can be selected individually for triggering Check selected links with HTTP requests.
 Archive-Cleaner#
During a continuous workflow, imperia archives the current state of a document at every step, i.e. for each workflow step, an archive version of the document is created. The larger the workflow, the more archived versions a document will have. For this reason the Archive can quickly become very large and unordered, which will reflect on its performance.
With this plug-in, you can automatically clean up the Archive of unfinished versions of documents on each pass of a workflow. The following options are available:
Configuration
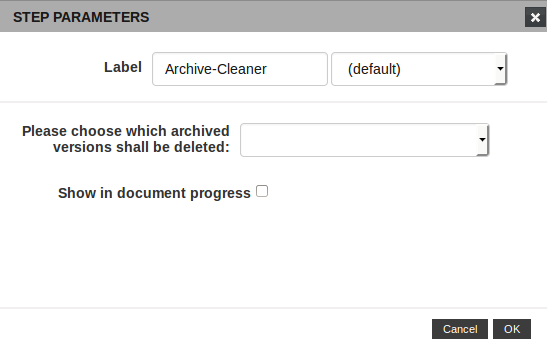
- Current unfinished versions: Deletes all unfinished versions, created before the last finished version.
- All unfinished versions: This option also includes the unfinished Archive versions, which were created after the last completed version.
- Old unfinished versions: Deletes all unfinished versions, created before the second to last finished version.
- Show in document progress: If the checkbox is selected, the workflow step will appear in the document progress in an imperia template. See also Displaying the Document Progress in the programmers manual.
 Asset-Actions#
This plug-in is applicable only when uploading asset files. In this workflow step, the actions available to an asset are specified. This plug-in can be both interactive or non-interactive as not every asset action requires user input.
Configuration
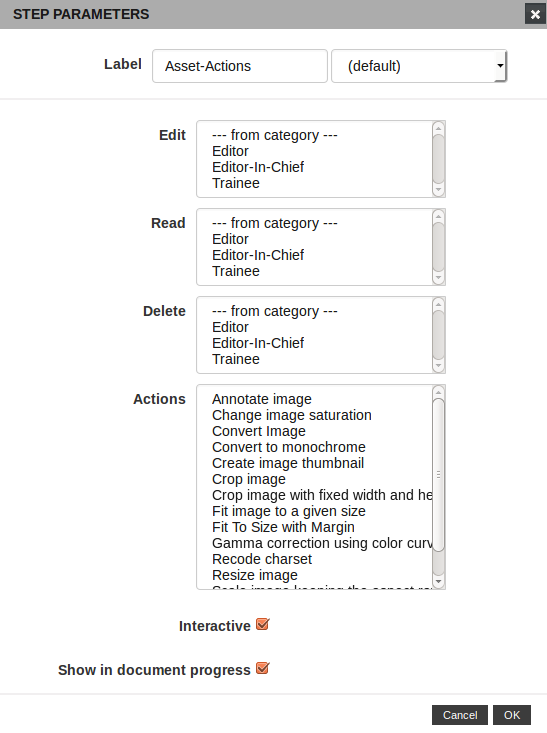
The following configuration options are available:
- Edit: Set which groups can edit a document that has reached this step.
- Read: Set which groups can see a document that has reached this step.
- Delete: Set which groups can delete a document that has reached this step.
- Actions: Choose the actions that will be available.
- Interactive: If the checkbox is selected, the uploader will see the predefined actions and will be able to select some of them. If the checkbox is not selected, the uploader will not see the action selection and all predefined actions will be available in the MAM.
- Show in document progress: If the checkbox is selected, the workflow step will appear in the document progress in an imperia template. See also Displaying the Document Progress in the programmers manual.
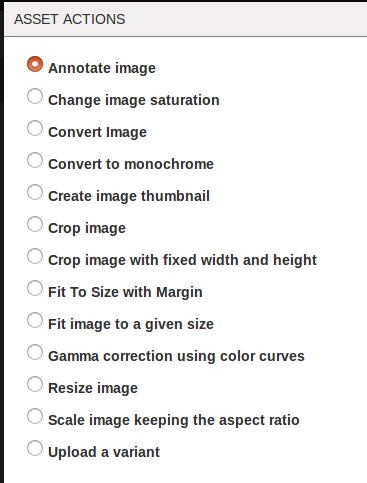
The asset actions are to be found in the MAM:
 Asset-Variant#
This plug-in is used to automatically create asset variants when uploading to the MAM.
Configuration
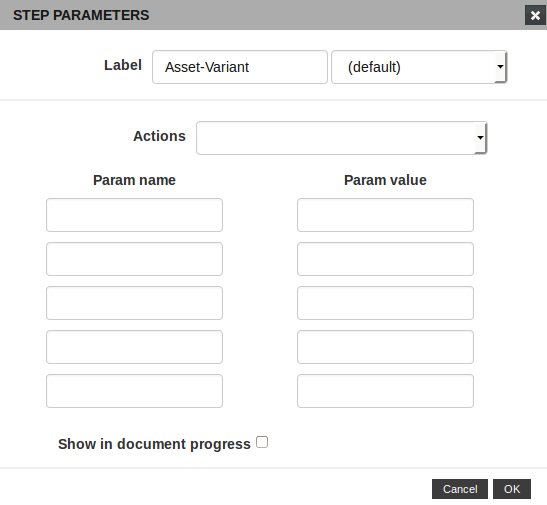
- Actions: Select the desired variant from the drop down list. These are the same as the asset actions in the GUI (see Asset Actions in the users manual)
- Param name: Define the parameters to be set. For example, if an image has to be resized the parameters will be “width”, and “height”.
- Param value: Set the value to the corresponding parameter. For example, “300px” for “width” and “200px” for “height”.
 Asset Publisher#
With the workflow-plugin "Asset Publisher" the user is able to publish assets independently from the refering document. With this plugin it is possible to define on category level, which assets will be uploaded directly to the target system. Furthermore it is possible to decide, if just the original asset is uploaded or its different variants.
This plugin is especially useful for assets which are used by third party applications.
The plugin is inserted at the end of the upload-workflow.
Configuration
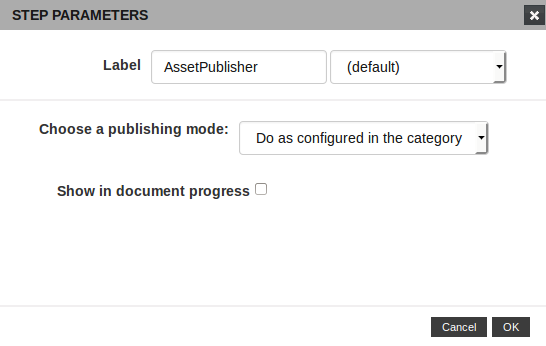
The workflow-plugin has four different settings for the publishing mode:
- Publish assets and variants: This setting is used to either copy the original asset and all its variants - even the thumbnail - in the publish list or directly upload it.
- Publish asset but no variants: Only original assets will be published but not its variants.
- Do not publish the asset: After being uploaded to the develop system neither the asset nor its variants will be published.
-
Do as configured in the category: With this setting the uploading behaviour is set by the category settings. This means that you can use a workflow for several categories and define the uploading behaviour for each category on its own. This is realized with the category variable "_imperia_ac_publish_"´. Following values are available:
-
^$: only the asset will be uploaded, not its variants -
.: both, assets and variants are uploaded -
An empty value will lead to the asset not being published automatically
-
It is also possible to just use a certain variant, for example thumbnails, by using "thumbnail" as the value.
-
If an asset is selected, you also have the functions for publication and depublication (expiry).
 Auto-Expiry#
This plugin automatically adds the current date as the expiration date for a document. The document will be cleared on completion of a workflow. For this to work, the background daemon has to be running. This plug-in requires no further configuration.
 Auto-Publisher#
This plugin automatically adds the current date as the publish date for a document. The document will be published on a target system when a workflow is completed. For this to work, the background daemon has to be running. This plug-in requires no further configuration.
 Cat2DocMeta#
This plug-in is used to overwrite document's meta fields with categories' meta fields.
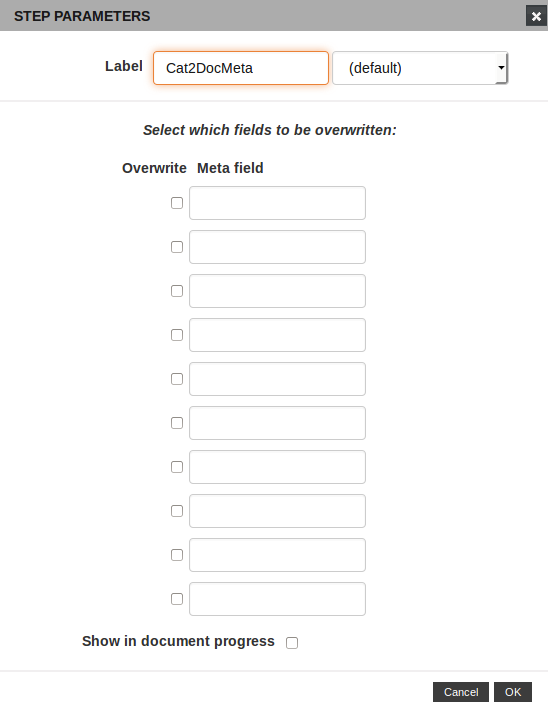
The following options are available:
Overwrite
Select the checkboxes of the corresponding meta fields, that have to be overwritten.
Meta field
Enter the meta fields to be overwritten. You may also use template variables.
Show in document progress
If the checkbox is selected, the workflow step will appear in the document progress in an imperia template. See also Displaying the Document Progress in the programmers' manual.
 Clone#
The Clone workflow plug-in generates an (almost) identical copy of an imperia document. Unlike imperia copy pages the new document is a standalone document and thus completely independent. Changes in the parent document, thus, have no influence on the newly created child document. However, there is a “loose” relationship between the documents, which simplifies handling. It is possible to use the meta variables __imperia_parent or __imperia_children to retrieve the parent, respectively the child documents.
Essentially, all meta variables of the parent document are copied to the child when it is created. However, these can be changed or deleted at will. It is important to note that all changes are carried out in exactly the order in which they appear in the plug-in configuration. In addition, changes are always performed on the basis of current meta variables and their values. For example, if the meta variable directory is deleted, it cannot be referenced subsequently.
The child document differs form the parent in the following meta variables:
| Metainfo variable | description |
|---|---|
| __imperia_node_id | the meta variable __imperia_node_id holds the NodeID of the newly created documents. |
| __imperia_created, __imperia_modified | Both meta variables hold the time in seconds for the period since January 1 1904 00:00:00 GMT for MacOS or January 1, 1970 00:00:00 GMT in other platforms. |
| __imperia_uid | holds the user id of the currently logged in user. |
| __imperia_meta_expand | if the meta variable directory exists, the meta variable __imperia_meta_expand holds the value 1. If present and with a value different than Null, the meta file directive <!--XX-METAMODE--> is true. |
| __imperia_parent | this meta variable holds the NodeID of the parent document. |
| __imperia_children | this meta variable contains all NodeIDs of existing child documents. Note that this variable is available only in the parent document. |
In addition, the following configuration options are available:
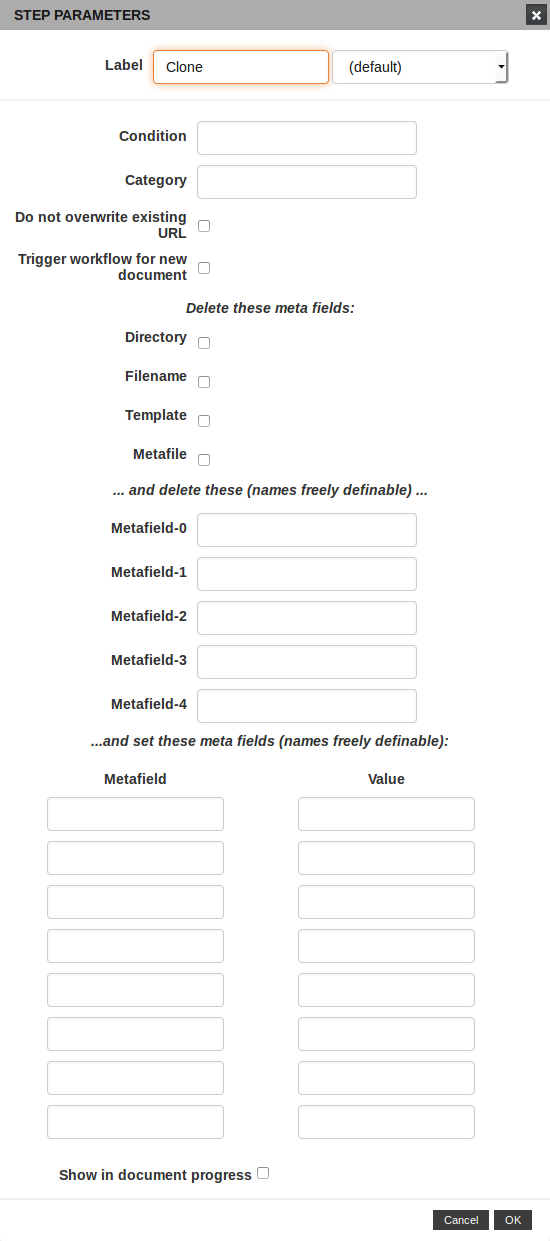
Condition
A document cannot be produced without a condition to prevent infinite loops in a workflow. A condition that checks the value of a variable to start the clone process has to be specified. The condition is interpreted by the template processor as an imperia IF statement, and must satisfy the standard syntax rules.
Example:
If you enter the condition:
"<!--XX-create_copy-->;" EQ "yes"
the following template code is evaluated:
 #IF ("<!--XX-create-copy-->" EQ "yes">)
   Documents are cloned...
#ELSE
  Documents are not cloned...
#ENDIF
The plug-in does not check the content of the condition. If you are sure that no infinite loop is created, you can specify a condition, which always returns true (Example: 1 or I know what I'm doing).
Category
As any other imperia document, the cloned document must be stored in a category. If nothing is specified in the Category field, imperia will save the document in the category of the parent. To save documents to a different category, its ID must be specified - /1/10. Another option, is to specify the name of the desired category, but this is not recommended as it has a negative impact on the performance. The system searches for the name of the category, which depending on the size of the category tree can take a long time. In addition, there may be problems if there are two categories with the same name.
Do not overwrite existing URL
If this checkbox is selected, imperia tries not to overwrite existing documents.
Trigger workflow for new documents
Normally, the new document is created, but not processed. However, if this option is selected, the document is “pushed” through the specified workflow and stops just before the first workflow plug-in which requires user interaction.
Delete these meta fields...
The meta variables directory, filename, template and metafile can be initialized with information that is read form the category definition. This is done by selecting the desired variables. If this options are not selected, the values are taken from the parent document. If the variable directory is deleted, so will the variable __imperia_meta_expand ( details on this variable, see above).
... and delete these (names freely definable) ...
Up to ten arbitrary meta variables, which should also be deleted from the new documents, can be specified here. Note: At this point imperia template variables can be used.
... and set these meta fields (names freely definable)
Up to ten arbitrary meta variables and their values can be created here. If these variables already exist, they will be overwritten. Note: at this point imperia template variables can be used.
 Document-Selector#
Note
The function of the plug-in can be replaced by the category's option Disable multiple documents (for more information read Categories).
The Document-Selector plug-in helps resolve URI conflicts.
Any number of documents with the same URI can be created with imperia. However, the URI of a document can change whenever it passes through a workflow.
If more documents with the same URI are created, this results in files being deleted in the document root. Often this result is desired. Sometimes, however, this results in an impairment for the administrator who needs to monitor the actual content of the file.
You can use the Document-Selector plug-in to adjust how URI conflicts are handled. This is possible on category level.
Each time a document goes through this workflow step, the category of this document is searched for documents with the same URI. The following cases are possible:
-
There are no documents with the same URI. Nothing happens, the workflow runs as normal.
-
There are one or more documents with the same URI. The conflict can then be resolved interactively. The URIs symbolic links are compared and anomalies as double slashes in the path are normalized.
The following options are available in the resolution of URI conflicts dialog:
-
Preview: click on a document title to display a preview of the document in a new browser window.
-
Status: a document can be either “in workflow” or “in Archive”.
-
Edit: cancel the current document and choose an already existing one for editing. With this the current document will be deleted and the selected one will go through the workflow. The pending workflow step of the selected document is executed. With documents, imported from the Archive, this is the workflow step after the Document-Selector.
-
Copy: copy the content of the selected document into the current one and go to the next workflow step. Select this option to create a new document, which content is based on an older version.
-
New document: leave the Document-Selector step without further action. The current document goes without any change to the next workflow step.
The following parameters are available:
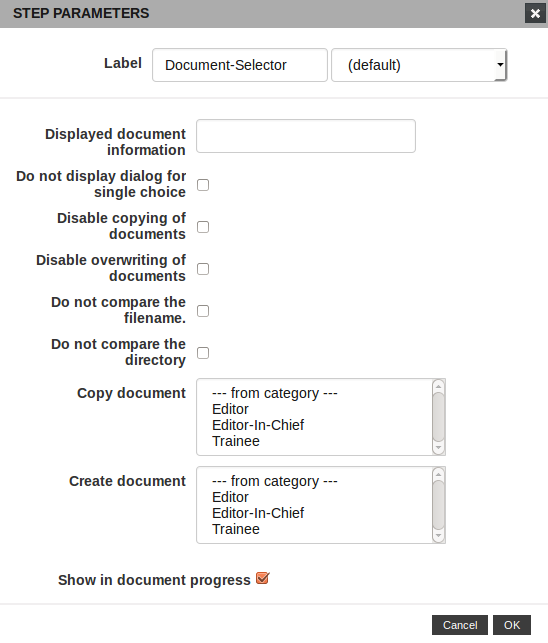
Display document information:
Normally, in the list of existing documents, the title is displayed in each case or [Untitled], if a document has no title. Since all workflow parameters are subjected to the template expansion, the display of the title corresponds to <!--XX-title-->. You may also read out other information about a document. For example, the owner of a document may also be displayed in brackets after the title:
<!--XX-title--> (User: <!--USER_CONF:name-->)
Do not display dialog for single choice:
With this option, the following behavior is enabled:
-
If there is a document with identical URI with another document and it cannot be copied, the last version of the document will be imported. In this case, no interaction window will be displayed and the current document will be deleted automatically. This occurs either when a user does not have permissions to make copies of this workflow step or making copies has been disabled globally. In fact, generation of multiple documents with the same URI is prevented in the relevant category. When a new document is created, the latest version is automatically imported from the archive. This version is edited and the new document is automatically deleted.
Note
This variant is suitable if, for example, only one document is created within a section and it has to be edited over time. In this way the last Archive version is always imported and overwritten and there are only a few archived versions of a document. Access permissions to the menu items Desktop and Archive is not necessary.
If you want to guarantee that no multiple documents have the same URI in a category select the option
Disable copying of documentsandDisable overwriting of documents. Compared to a restriction on the group permissions, this has the advantage that users cannot bypass this rule with access to the superuser group. -
If there is more than one document at an URI, the user gets a dialog box, where the conflict has to be resolved.
Disable copying of documents:
If this option is selected, it is not possible to create a new document, based on the content of an already existing document with an identical URI. All copy permissions possibly set in this workflow step are deactivated by this setting.
Disable overwriting of documents:
If this option is selected, an already existing document with an identical URI can either be edited or overwritten by a document based on the content of this previously existing document. All create permissions possibly set in this workflow step are deactivated by this setting.
Do not compare the filename:
If you do not wish the system to compare the filename of the current document with the filenames of existing ones, select this checkbox. In this case, imperia will only compare the filenames of the parent and child document.
Do not compare the directory:
If you do not wish the system to compare the directory of the current document with the directories of existing ones, select this checkbox. In this case, imperia will only compare the directories of the parent and child document.
Copy document:
Select the groups that are allowed to make copies on the basis of existing documents.
Important
Note that users that can assume the superuser group are not subjected to any of the restrictions.
Create document:
Select which groups can use the “New Document” option.
Note
Even though a new document has already been generated at the point of this workflow step, “New Document” means that the current document is not deleted.
Important
Note that users that can assume the superuser group are not subjected to any of the restrictions.
Show in document progress
If the checkbox is selected, the workflow step will appear in the document progress in an imperia template. See also Displaying the Document Progress in the programmers manual.
 Edit#
Edit#
This plugin opens a template for a user to enter content. Input data can be stored or discarded.
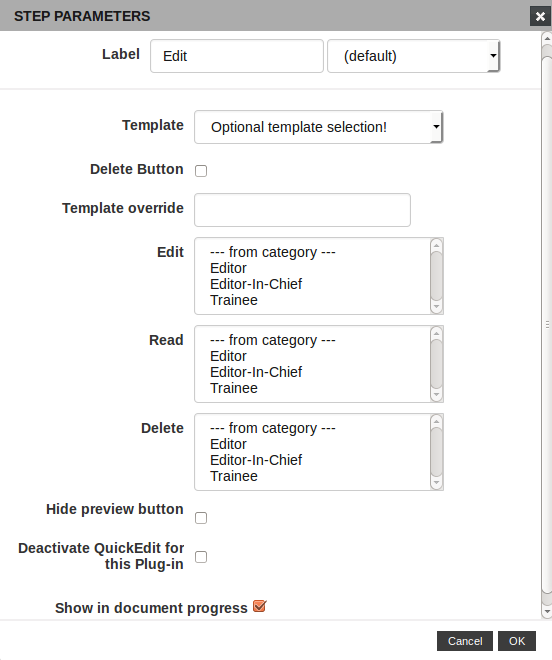
The following options are available:
Template
A different template than the one defined in the category, can be set with this function.
Delete Button
This button allows a user to delete an opened document, including the Archive versions and associated objects.
Template override
This option allows you to replace a pre-selected template. You can also use XX-variables to supplement, for example, a template variable name with a suffix.
Edit
Set which groups can edit a document that has reached this step.
Read
Set which groups can see a document that has reached this step.
Delete
Set which groups can delete a document that has reached this step.
Hide preview button
Hides the Preview button in a template.
Deactivate QuickEdit for this plug-in
If this option is set, the affected plug-in is skipped during processing using the One-Click-Edit toolbar.
For more details, please see System Configuration Variables.
Show in document progress
If the checkbox is selected, the workflow step will appear in the document progress in an imperia template. See also Displaying the Document Progress in the programmers manual.
 Edit +#
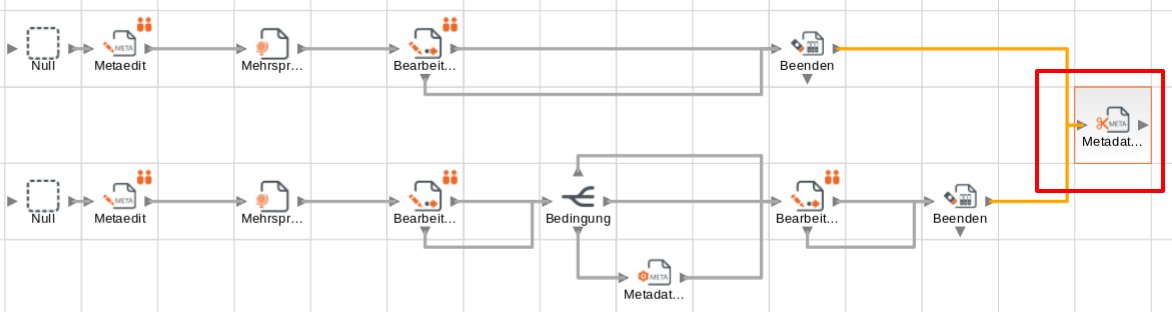
This plugin is an extension to the Edit plug-in. It provides an additional exit (south), which is used when a document is saved. The function of the output to the east is identical to the function of the output of the simple Edit plug-in.
The “Edit +” plug-in can be used for example, to detect the process of generating random content.
Example:
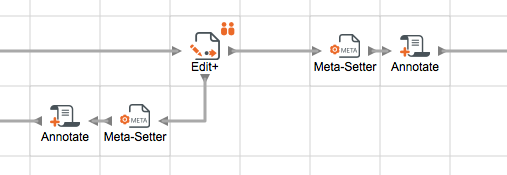
This excerpt from a workflow forms the following function:
Each time a document is edited and saved, it leaves the workflow step through the southern exit and then passes through the MetaSetter and then the Annotate plug-in.
Note
All plug-ins which adjoin the southern output, must be non-interactive.
Then the document waits for the next processing. If the workflow step is completed, the document leaves it through the eastern exit, also passing through these two plug-ins (so that the same actions are performed as when saving) and then enters the next workflow step.
Important
This plug-in may be mistaken with an outdated function, called “Edit and Go”. It was a button that directly triggered the next workflow step.
The configuration corresponds to that of the Edit plug-in.
 Eraser#
Insert the Eraser plug-in to delete a document, including any existing copies on a target system. The document can then be further processed in a workflow. The Archive version(s) of the deleted document are retained. The plug-in requires no further configuration, except whether the step to be shown in the document progress.
 Exists#
The Exists plug-in checks if a document has already passed through a workflow with the same URI. This means that there is another document with the same values in the meta fields directory and filename whose status is finished.
If the condition is met, the output “yes” (south) is taken, “no” (east) otherwise.
Note
Note that the condition is the existence of a different document. If the plug-in finds an already existing document with the same URI, but this document turns out to be a previous version of the one that is currently passing the plug-in, the plug-in considers that URI to be non-existing. This is necessary in order to avoid difficulties when editing an already published document.
This plug-in requires no configuration.
Older imperia versions resolve any conflicts in the URI simply by overwriting the existing document. Using the Exists plug-in gives the opportunity to take precautions in the event that a document with the same URI exists. Typically, the plug-in is placed at a point in a workflow where the URI of a document is no longer subjected to change, so it is “stable”.
 Expiry#
This plug-in helps determining the expiration date of a document. A user will get an input mask in which to select an expiration date via a drop down list when this workflow step is reached. Thus, when a set date is reached, the document is deleted. The Hermes must be running on the develop and target systems for the plug-in to work.
The configuration for this plug-in is the same as for the plug-in Publishdate.
 Finish#
This plug-in is used at the end of a workflow to clean up the Archive and check references in a document.
Configuration
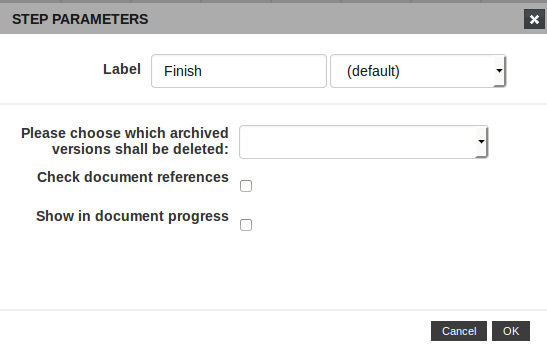
Please choose which archived versions shall be deleted
Use this drop down list to specify which archived versions have to be deleted before a document is published. There are four available option:
-
None - no action will be taken;
-
All unfinished versions - deletes all versions of the current document, that haven't been finished;
-
Current unfinished versions - deletes all current unfinished archived versions;
-
Old unfinished versions - deletes all archived versions of a document that has been republished.
Check document references
If the checkbox is selected the system will verify the references within a document. If a reference has not been found, the document will exit the step through the south output of the plug-in.
Show in document progress
If the checkbox is selected, the workflow step will appear in the document progress in an imperia template. See also Displaying the Document Progress in the programmers manual.
 If-Else#
This plug-in is used to determine the path of documents depending on one or more conditions. It has three outputs and requires no user input.
If the first condition is met, documents exit through the north exit. If the first condition is not met, the second condition will be checked.
If the second condition is met, documents exit through the eastern output. If the second condition is also not met, the southern exit is used.
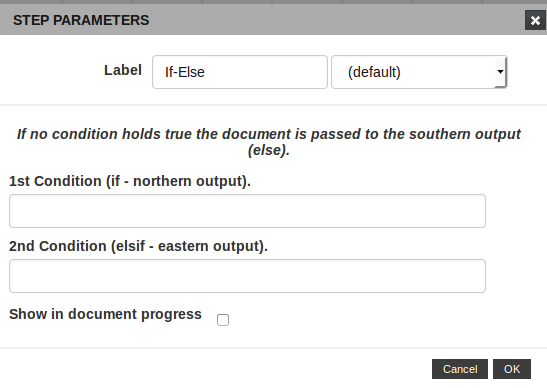
The conditions are entered in the plug-in's properties dialog. The syntax is almost identical to the syntax for IF statements in a template. Only the parentheses have to be omitted.
If one of the inputs is left empty, the condition is considered as not met.
Pay attention to spaces, tabs, line breaks and the like when entering conditions. Spaces at the beginning and at the end of a command line are ignored. Multiple spaces within the text are combined to a single space.
 Mail#
Mail#
This plug-in enables you to send emails.
Prerequisites
- In order to use this plug-in, it is necessary to install the following Perl modules
HTML::FormatText::WithLinksandEmail::Address. - Furthermore, the
system.confvariableSMTP_SERVERhas to be set with the appropiate SMTP server.
Configuration
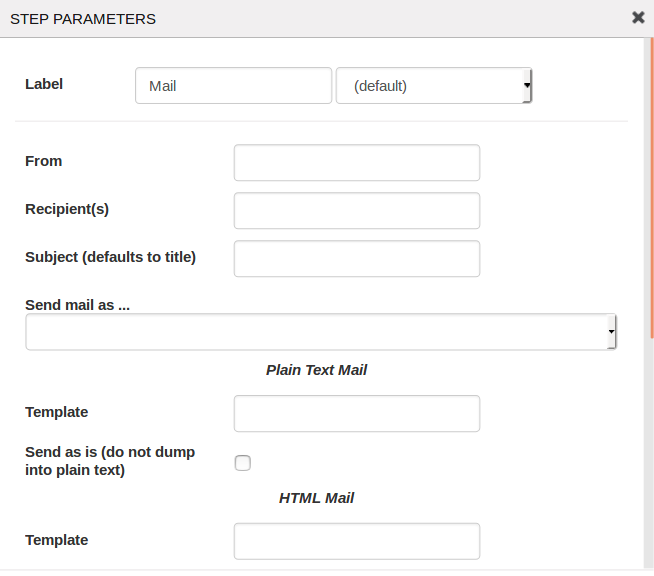
You can set following parameter:
- From (sender): Here you can enter the email adress of the sender. If the field remains empty, the email adress of the current user will be used. If both options don't apply, the fallback email adress of the web server will be used.Here, you can also enter imperia template code.
-
Recipient(s): You can enter multiple recipients by using coma. Recipients entered here are visible to other recipients. Here, you can also enter imperia template code. Following formats of an external email adress are permitted:
john.doe@pirobase-imperia.com-
<john.doe@pirobase-imperia.com> -
John Doe <john.doe@pirobase-imperia.com> -
"John Doe" <joh.doe@pirobase-imperia.com>
-
Subject: If you don't enter the subject, the document's title will be used as the subject.
- Send mail as: Choose how the email should be send. If no option is selected, the option HTML and plain will be chosen.
- Template: Here you can enter the names of the templates that should be used for creating the email.If no template is entered, the document's template will be used. In case the template has been processed the meta field
__imperia_mailerwill be set to1automatically. - Send as is (do not dump into plain text): If this option is not set, imperia presumes
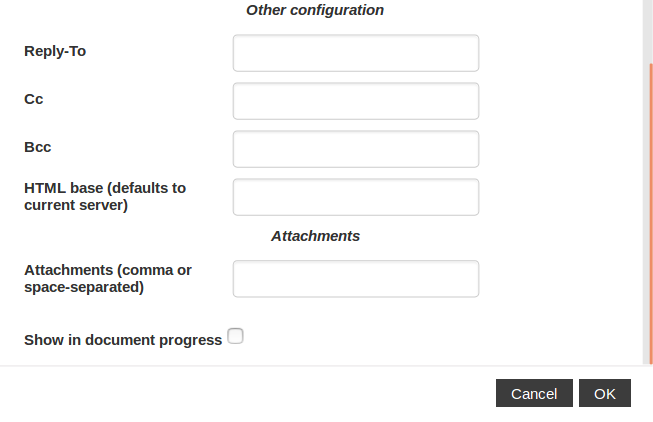
HTMLas the output of the template processor. Consequently, further output will be the plain text format.Activiating this option is therefore only useful, when the template creates plain text. - Reply to: Enter a reply address. Here, you can also enter imperia template code.
- Cc: For entering more recipients. Recipients added here are also visible to other recipients.Here, you can also enter imperia template code.
- Bcc: For entering more recipients. Recipients added here are not visible to other recipients.Here, you can also enter imperia template code.
- HTML base (defaults to current server): For the HTML version of the email, imperia tries to set the
<base>-tag. The content of this tag is the address of the web server. Here, you can enter the server address in form ofhttp://www.pirobase-imperia.com. - Attachments (comma or space-separated): Enter the attachments here.
- Show in document progress: If you check this box, the plug-in will be shown in the document's progress. The mail server and the parameter will be entered in the
system.conf.
 Metaedit#
This plug-in displays the input mask of a meta file and stores data entered there.
Configuration
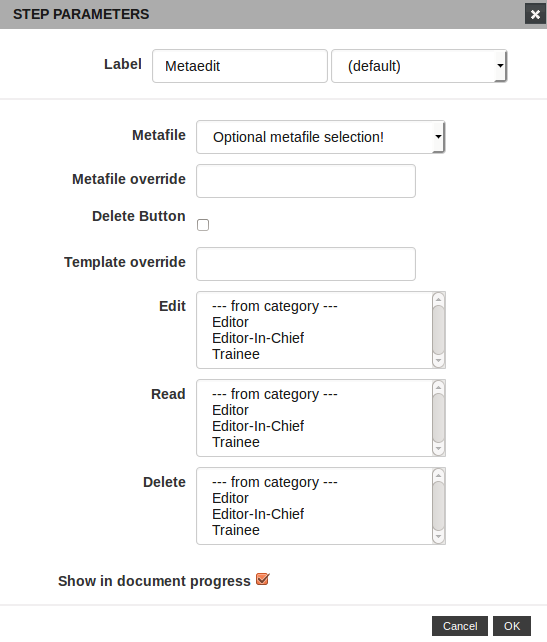
The following options are available:
Metafile
Select an optional meta file that is different from the default settings of a category.
Metafile override
Enter the name of an alternate meta file that is to be used in this step. Additions can be made via XX-variables.
Delete Button
This checkbox controls whether or not there is a Delete button in the Metaedit step.
Template override
This option allows you to replace a pre-selected template. You can also use XX-variables to supplement, for example, a template variable name with a suffix.
Edit
Set which groups can edit a document that has reached this step.
Read
Set which groups can see a document that has reached this step on the Desktop.
Delete
Set which groups can delete a document that has reached this step.
Show in document progress
If the checkbox is selected, the workflow step will appear in the document progress in an imperia template. See also Displaying the Document Progress in the programmers manual.
 Meta-Setter#
This plug-in allows value assignment to any meta fields within a workflow. Both the name and the value of a meta field are expanded in the same way as within a template.
Example:
last_change <!--Xstrftime:en_US:%c-->
Hereby, the value for the meta variable last_change is set to en_US_Locale. If there is, for example, a meta variable timestamp, it could be used as a key <!--XX-timestamp-->.
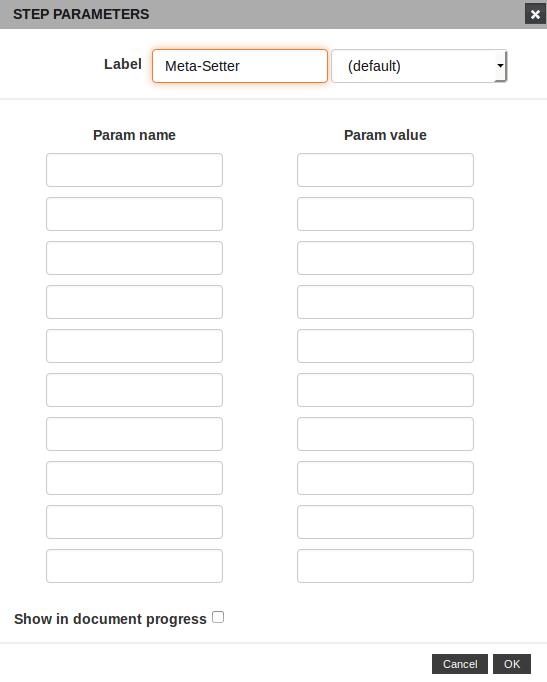
Currently, ten meta variables can be set in the plug-in. However, it is not possible to assign multiple values for each meta variable.
 Meta-Splice#
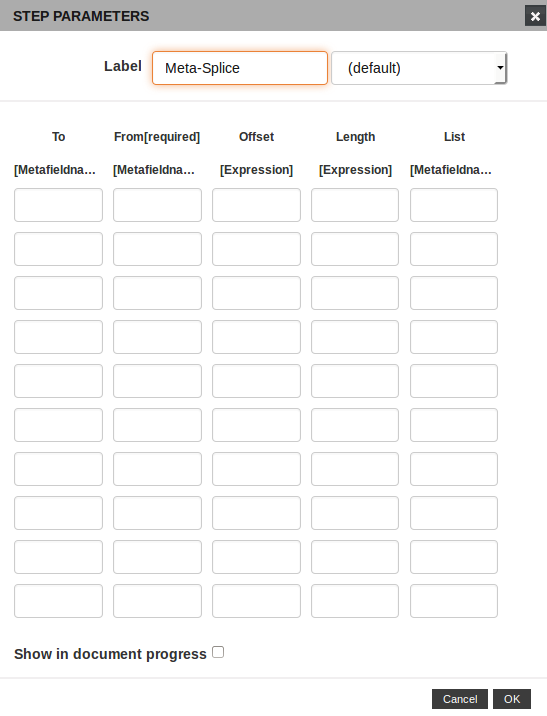
The Meta-Splice plug-in selection reflects the functionality of the Perl function splice() to edit meta data. The configuration of the plug-in is analogous to a Perl function call. As with Perl splice, you can use this plug-in so the functions shift(), unshift(), pop() and push() apply to data in meta fields.
This plug-in enables you to implement workflows with loops, see following example:
Configuration
The plug-in has the following options:
To
Set a target meta field here.
From
Set a meta field that will be the basis for the meta splice.
Offset
Define at which element to start the removal; give a negative value if the removal has to start at the end.
Length
Set how many element to be removed. If length is left empty, all elements from the offset onward are removed.
List
Set elements that have to replace the removed once.
 Multilanguage#
This plug-in is used with multilanguage documents. It can only be present in workflows for categories that have the meta variable linguas set in their meta information. Furthermore, documents must also contain the variable linguas or the MULTILANG_SELECTION directive in their meta file.
The plug-in automatically sets the no_publish meta variable to 1, which prevents the publishing of “master” documents. If the “master” document has to be published, this setting can be changed later in the workflow via the Meta-Setter plug-in.
Note
Please make sure that the Multilanguage plug-in comes after the MetaEdit plug-in. Changing the order may lead to unexpected behavior.
Also, the variable __imperia_preview_select_name is set to none, which hides the “master” document from the preview list of document copies.
A variable linguas_languageCode will be filled for every language used.
Configuration
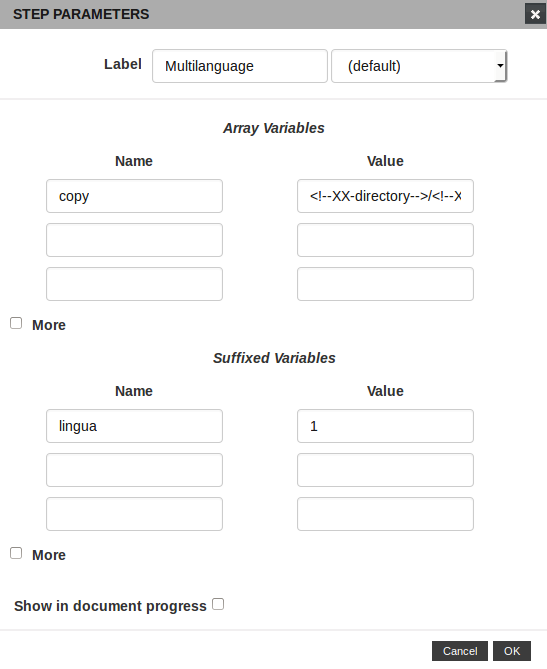
Array Variables
Tip
You are able to add more arrays by simply clicking the checkbox More.
Array variables will have exactly as many values as the originating variable linguas. For each language in linguas one value will be created.
By default, the first array variable is filled. Its name is “copy” and it has the following value:
                //THE CODE IS WRAPPED FOR REPRESENTATION PURPOSES!

<!--XX-directory-->/<!--XX-filename-->.<!--XX-lingua-->:
TEMPLATE=<!--XX-template-->:
__imperia_preview_select_name=<!--XX-CODE2LANGUAGE:lingua-->:
lingua=<!--XX-lingua-->
-
This is the path to a document, which in this case receives a language extender.
-
The default setting <!--XX-template--> means that all language copies of a document use the template defined for the “master” page.
-
The
__imperia_preview_select_namespecifies the label to be used in the preview section of a document. Using <!--XX-CODE2LANGUAGE:lingua--> escapes the language code (e.g. “en” will be displayed “English”). -
This is necessary because the variable “lingua” exists only in edit mode. In order for the language extension to work in save mode, the variable has to be explicitly added.
Suffixed Variables
Unlike the “Array variables” that create a meta variable with several values for each language, the “Suffixed Variables” create separate variables for each language.
The default setting for the Suffixed variables is a lingua variable with the value 1.
The result is as many variables as the languages used (e.g. lingua_en and lingua_de; if English and German are used), all being defined to the value 1.
Show in document progress
If the checkbox is selected, the workflow step will appear in the document progress in an imperia template. See also Displaying the Document Progress in the programmers manual.
 Null#
Null#
This plug-in does not have any further functionality. It could be used as a basis for developing other plug-ins or to improve the clarity of highly branched workflows.
The Null plug-in is also “auxiliary workflow input” that enables changes at the beginning of a workflow.
A workflow is set for every category, in which documents can be created. Because of this reason, the entry point of a workflow is stored in a category's properties (e.g. “MetaEdit”). However, if a workflow is changed by prefixing another plug-in as entry point, for example “Document-Selection”, the original workflow entry point cannot be deleted. This leads to error messages and no more documents can be created in the category with the modified workflow.
The Null plug-in is used to avoid this problem. If Null is saved as entry point to a workflow, it is easy to put another plug-in between Null and the next step.
This plug-in requires no further configuration, except whether the step to be shown in the document progress.
 Publish Elements#
With the workflow-plugin "Unlock element" the user is able to unlock elements independently from the refering document. By this you can prevent the parsing of large XML-files or old CSS-files being transfered. It is also possible to publish the elements, which are included in the metainfo-object but not in the savemode.
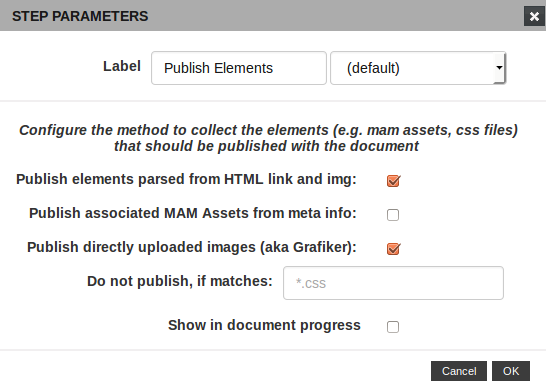
The workflow-plugin has three different settings.
Publish elements parsed from HTML link and img
This setting is the default behaviour of imperia. The HTML of the published document is searched for img- and link-elements. All objects found in this element are published as well as the document.
Publish associated MAM Assets from meta info
Assets which are not included in SAVEMODE are also being published. By this you can publish assets which are not referenced in the HTML of the document.
Publish directly uploaded images (aka Grafiker)
This setting also is the default behaviour of imperia. The editor has two possibilities to insert images in his document. By using the MAM or the graphic-uploader. Both features can be edited in EDITMODE. The dialogue for the graphic-upload is usually accessed by using the button "Upload". If you deactivate this setting, alls assets inserted by the graphic-upload won't be published with the document. This setting is mostly a security setting, to make sure that the graphic-upload is not used.
 Publishdate#
This plug-in gives a user the opportunity to enter a publish date for documents. Document are automatically published when this date is reached. This plug-in requires the Hermes to be running on the develop system.
Configuration
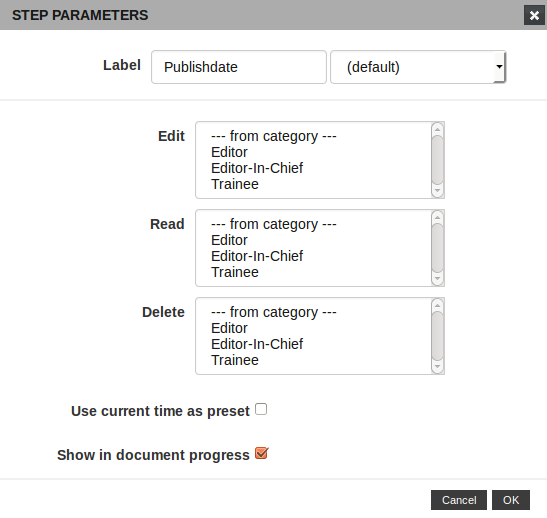
In the configruation you setup the access permissions for this plug-in. Determine which groups can edit, read or delete a document in this workflow-step.
Use current time as preset
Select the checkbox to preset the time at which a document reaches this step as publish date.
Show in document progress
If the checkbox is selected, the workflow step will appear in the document progress in an imperia template. See also Displaying the Document Progress in the programmers manual.
 Random#
This plug-in has three outputs, one of which is randomly selected and a document is sent to the subsequent plug-in.
Configuration

You can assign a weight to each output, used to influence the distribution of documents to different outputs. To calculate the weight of an output, the sum of the three weights assigned is divided by the value assigned to the corresponding output.
For example, if the northern output has a weight of 4, the eastern - a weight of 10 and southern assigned - a weight of 6, documents are distributed as follows:
-
20% to the north
-
50% to the east
-
30% to the south
Instead of numbers, parameters can also be calculated by the template processor, such as <!--XX-time_to_spare-->. If a parameter is empty or 0, it is treated as if it has a value of 1 to avoid a division by 0.
 SEO Plug-in#
A SEO workflow plug-in is introduced in imperia 10. The plug-in is intended to help you with your search engine optimization to make your site easily accessible on the internet. imperia's SEO plug-in provides you with a checklist of the best practices for search engine optimization, as well as search preview and keyword presence information The SEO dialog can be customized by setting a system configuration variable. There you can add one or more SEO-Plug-ins to the variable. (You will find the available SEO Plug-ins in: site/modules/core/Dynamic/SEO)
Example:
SEO_PLUGINS = "Title,Url,Robots"
In order to use the plug-in you need the following Perl modules:
-
Web::Query::LibXML
-
HTML::TreeBuilder::LibXML
OR
-
Web::Query
You will also need a workflow, containing the SEO step, read the user manual for more information.
 Shredder#
This plug-in deletes documents from a workflow without further prompt. At the same time all archived versions of this document and all embedded objects are removed. This plug-in requires no further configuration, except whether the step to be shown in the document progress.
 SmartMeta#
This plug-in changes the metadata of a document using a previously defined mapping table. For example, user input can be converted into words for search engines without any manual input. This plug-in requires no further configuration, except whether the step to be shown in the document progress.
 Sub-Workflow#
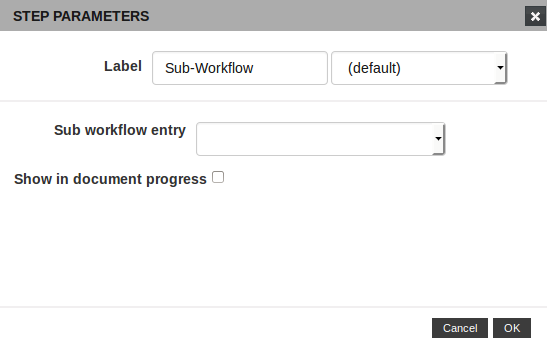
With this plugin you can divide complex workflows into modules. These modules are similar to codeincludes and can be used in several large workflows.
The content is read at the start of the main workflow, so that the procedure is exactly as if the individual steps would be directly involved in the main workflow.
Select which workflow to load via the drop down list Sub workflow entry.
An example:
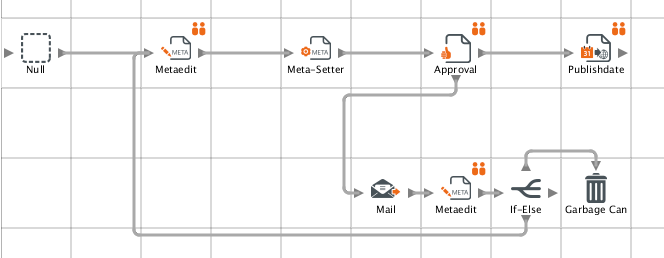
In the above example, a document has to be approved before publication.
If a document is not approved, editors can still choose between two options. Either the document must be corrected or created from scratch. In the first case it is led back to the MetaEdit step; in the second deleted. In addition, the responsible editor will be notified by e-mail.
The path a document takes in case it is not approved, can be substituted by a Sub-Workflow step.
For this, a separate workflow is created that contains the steps in this branch. The following figure shows the structure of this workflow:
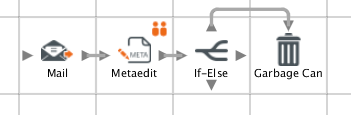
The main workflow of the corresponding branch is removed and replaced with a plug-in:
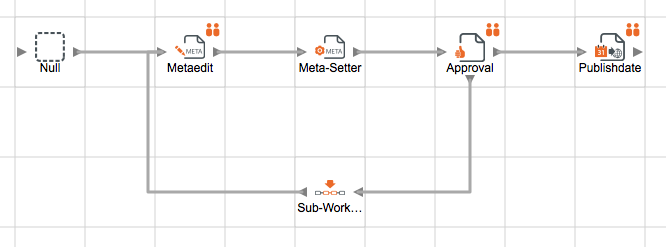
Which workflow should be loaded into the main workflow is determined in the plug-in's configuration.
 Transform#
This plug-in can perform the settings of meta information via special transformation plug-ins.
You can write your own transform-plug-in in Perl and save it under site/modules/core/Dynamic/Transform. There you will also find example plug-ins.
Configuration
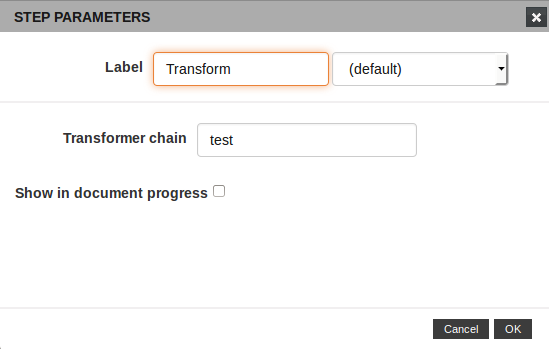
Subsequently, you write the name of the transform-plug-in into the field Tranformer Chain; you can add a transform-chain by adding multiple coma-separated plug-in-names.
 Trash#
This plug-in removes documents from a workflow without further query. It does not remove any archived document versions or files, belonging to a document (images, multimedia objects, etc.). This plug-in requires no further configuration, except whether the step to be shown in the document progress.
 Upload Asset#
This plug-in is used only in connection with asset documents. It controls the way an acquired with a meta template asset is stored, as well as the transfer of an asset file from a local system to imperia develop system. It can be both interactive and non-interactive.
Configuration
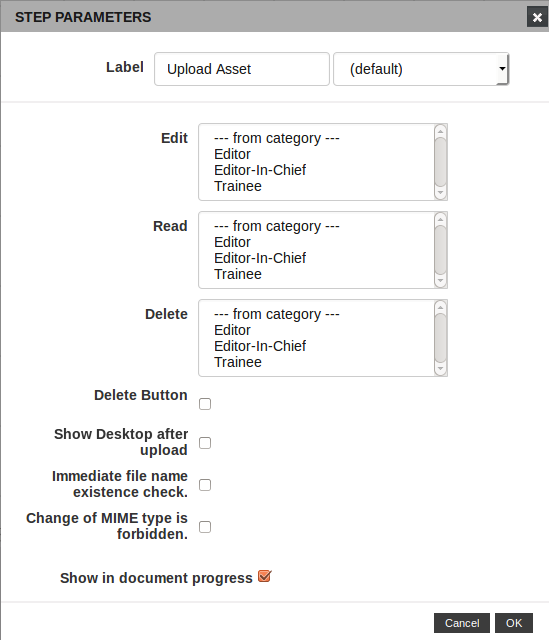
Edit
Set which groups can edit a document that has reached this step.
Read
Set which groups can see a document that has reached this step.
Delete
Set which groups can delete a document that has reached this step.
Show Desktop after upload
By default, after the Upload Asset step a workflow continues to the next step. If instead you want to go to the Desktop, select this checkbox.
Immediate file name existence check
If this option is enabled, imperia checks if the filename of the uploaded asset already exists. If this is the case, the workflow remains in the upload step and a warning message appears.
After that either the override option can be selected or a new name can be assigned.
Note
This plug-in does not work with multiupload. If the option override is not selected beforehand, no asset will be uploaded if filenames match.
Change of MIME type is forbidden
This option intervenes when an existing asset is reimported. It prevents the upload of an object with a different from the existing file format.
If the asset was, for example JPEG, selecting this option will prevent upload of PNG images.
Show in document progress
If the checkbox is selected, the workflow step will appear in the document progress in an imperia template. See also Displaying the Document Progress in the programmers manual.