Managing documents
With the document browser imperia offers you a clear administration of all documents and assets in a folder structure.
Working with the Document Browser#
In the Document Browser, you can display documents or files separately for each target system or only for the development system. In addition, you can display all documents and assets together in one structure. All documents and files and their workflow status are displayed. Deleted documents that can be found in the archive are an exception to this.
The Document Browser provides you with the usual functions that you will need for editorial work (e.g. create, delete, reparse documents, etc.). Optionally, additional columns are offered in which you can view the workflow status of the document.
Structure and functioning of the Document Browser#
Open the Document Browser by clicking Documents -> Document Browser:
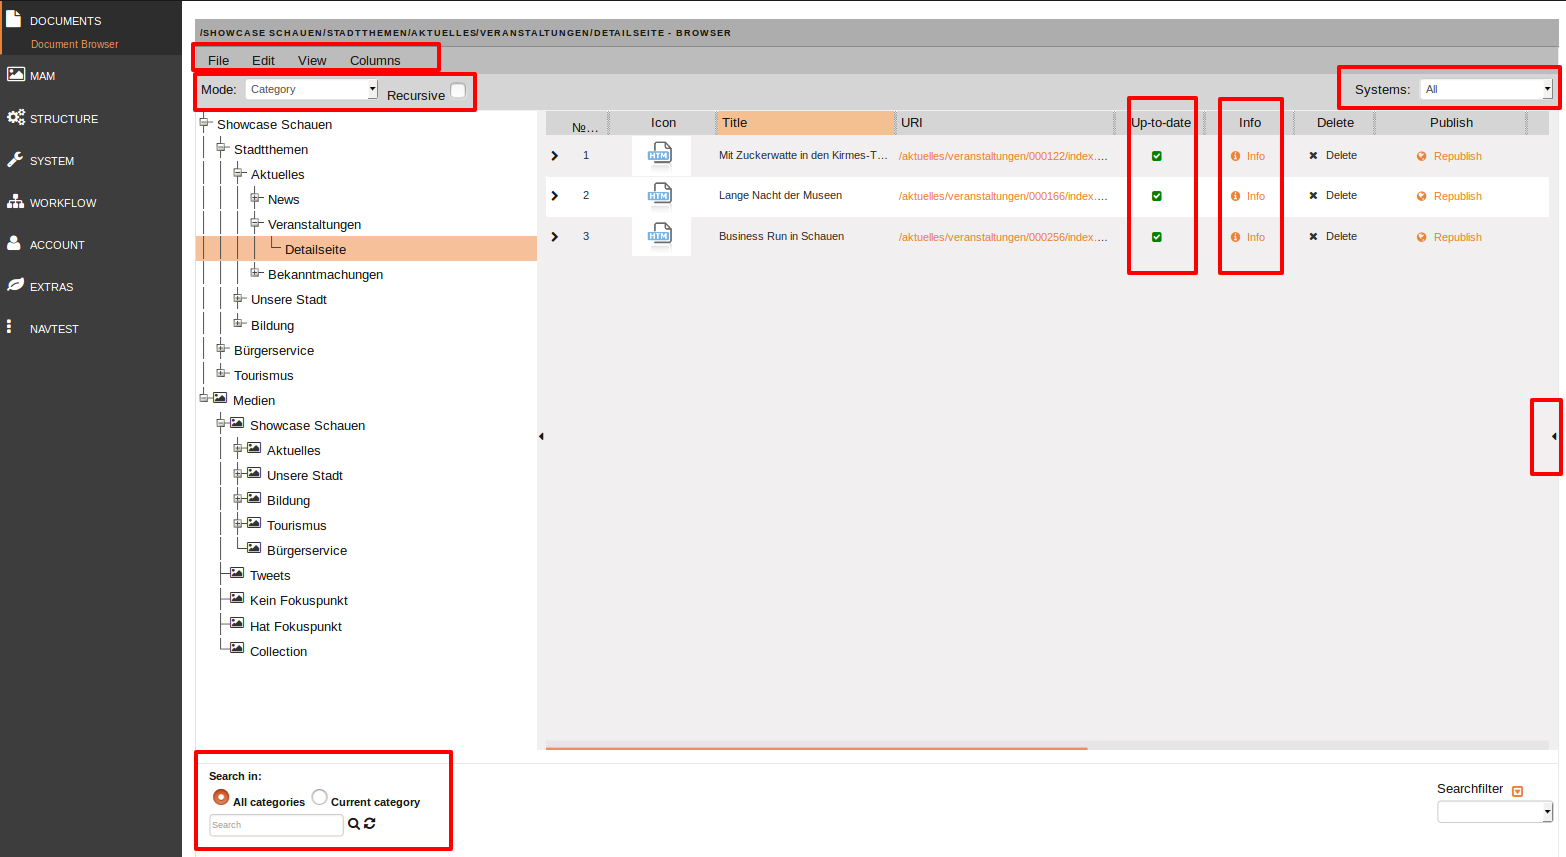
The Document Browser contains the category tree on the left and a table and preview window (hidden in the figure) on the right.
The MAM and the Linktool are based on the Document Browser, so the design and the way these modules work are very similar.All modules have a search function for categories, which is located in a third area below the category tree and table. The search results are displayed in the table.
The menu bars and columns also contain other important elements that are described below:
Menu bars
The Document Browser has two menu bars located one below the other. The upper menu bar contains functions for editing documents, while the lower menu bar contains functions for adjusting the view in the Document Browser.
-
File:
- Create New Document: This option takes you directly to the workflow defined for the selected category. Make sure that you are in the correct category.
- Archiv: In the Document Browser, first select the category whose previous versions you want to view in the archive. This option takes you directly to the archive and the corresponding branch of the category tree, from where you can select a document and import a previous version.
-
Columns:In this menu, you can activate the columns that you want to be displayed in the table.
- Views: This menu contains functions with which you can adjust the view in the Document Browser.
- Mode: Use this option to select between Category and Directory for the display of the folder structure.
- Recursive: You can activate this checkbox if you also want the subfolders to be displayed. In this case, the subordinate categories are also expanded.
- Systems: Here you select the target or development system whose structure is to be displayed in the Document Browser.With All you can also display all documents in the Document Browser.
Columns
Functions and important information for each document are stored in columns. If you want to add a column to the table, use the Columns option in the menu bar and then activate the checkbox in front of the desired column to show it. The following columns are offered for the Document Browser:
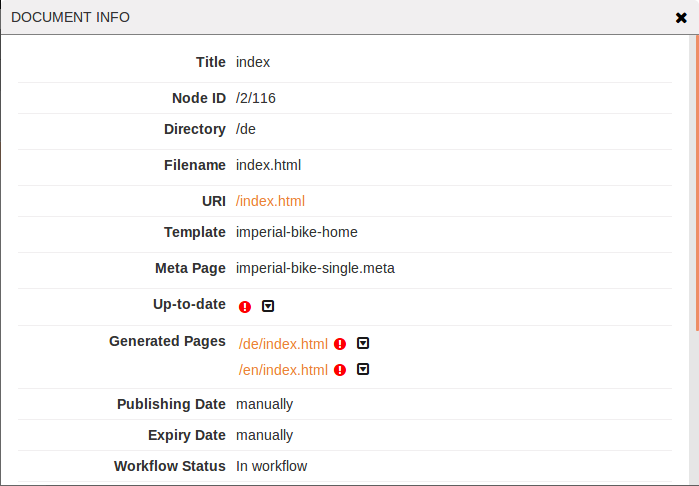
- Info: Using the Info link in the column of the same name, you can access all information and functions for the selected document that are contained in the other columns in a separate dialog at a glance. Via you can, for example, publish the document again in the selected target system, delete it directly or reimport it.
-
Publish: This column allows you to publish documents and assets. This column is particularly relevant for assets: It can be used to publish assets independently of documents. This function can also be performed in MAM.
-
URL: This column contains the document path. If you click on it, the document opens in preview mode.
-
Up-to-date: This column uses an icon to indicate whether the document on the target system matches the document on the development system (green checkmark or red exclamation mark). Click on the icon to obtain information on the document publication status
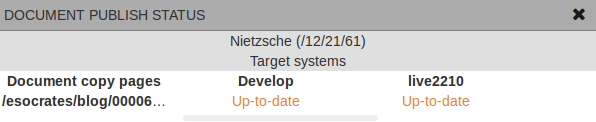 The first column contains a list of all copy pages of the document. In the other columns, the available target systems are displayed with their status. The following states are possible:
- Up-to-date: The document versions on the development system and on the target system are the same.
- Outdated: The document version on the target system is older than that on the development system.
- N/A: There is no information available.
- Manually deleted: The document was deleted manually from the target system.
- Trigger fail: This status appears if the publishing trigger is defined for the corresponding target system, but the document (or copy page) does not correspond to the conditions and is therefore not published.
- Missing on Develop: The document was deleted on the development system, but still exists on the target system.
-
Reparse: In this column you will find the button to start the Template Reparser.
-
References: This column shows whether the current document is referenced in another document.
Note
Note that these references are only references in other documents and not assets to which the current document references. Referenced assets in the document can be viewed in the Info column under References.
-
Re-importing: Reimported documents are set to the first step of the original workflow by the target system. If the workflow has been changed in the meantime, reimported documents will pass through the new workflow..
Note
If the imported document is in the workflow (and therefore also on the Desktop), this re-import option is not possible.When attempting to re-import the document, you receive the error message "In workflow".
- Use the link in the Re-Import column.
- Confirm the security message.
- Optionally make an archive entry.
- Save your settings by clicking OK. The reimport is being performed. You reach the first workflow step of the document, for example Meta-Edit.
-
Delete:This column contains a link that you can use to delete the document from the development system.
Note
To delete a document, you need both write and delete permissions for the corresponding category.
- Click on the link of the same name in the Delete column. You can also select multiple documents by selecting the checkboxes in the № column.
- In the new dialog, choose whether you want to delete the documents from the workflow or from the archive.
- Confirm by clicking Delete. If the document was successfully deleted, a status report with a green bar appears. If the document was not deleted, a red bar appears. For both statuses, you receive further information.