Templating
Structure#
In the menu Structure you can find the functions for managing the following subjects via the user interface: categories, meta files, templates, flex modules, slots, codeincludes, template reparser, restructuring categories and directories.
For a better overview, the topics categories and restructuring categories and directories are to be found in own chapters.
Information about creating and programming these files can be found in separate chapters in the Programming Manual. This chapter will cover the administration aspects.
Meta Files#
All meta files can be maintained through the meta file manager. You can use the dialog to edit, delete, create and load meta files.
Further permissions for each meta file can be set or revoked. These include
-
write,
-
modify,
-
read and
-
delete.
To change permissions, read Manage File Permissions in imperia in this chapter.
To access the meta files manager go to Menu->Structure->Meta Files. The following dialog opens:
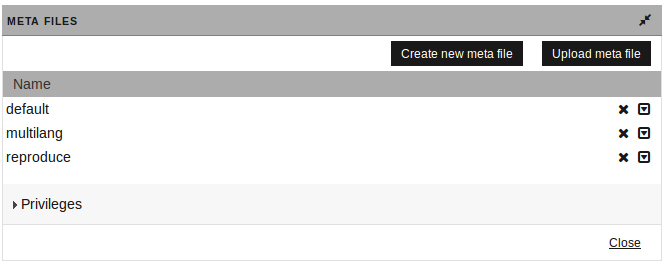
The dialog is divided into three sections:
Links
The top-most section contains the buttons Create new meta file and Upload meta file. To learn more about these functions read Create a New Meta File or Uploading a New Meta File.
File list
This list includes all equipped meta files. In addition, the functions for editing, deleting and setting permissions are available in the file list. Clicking on the name of a meta file opens the internal editor. In the menu, the Chmod function is available, where the ACL of meta files can be changed.
Privileges
This section is collapsed on load. To open it click on the title. It contains the read and modify permissions for all the groups on a system. See also Manage File Permissions in imperia in this chapter.
Create a New Meta File#
To create a new meta file, proceed as follows:
-
Open the meta file manager under Menu->Structure->Meta Files.
-
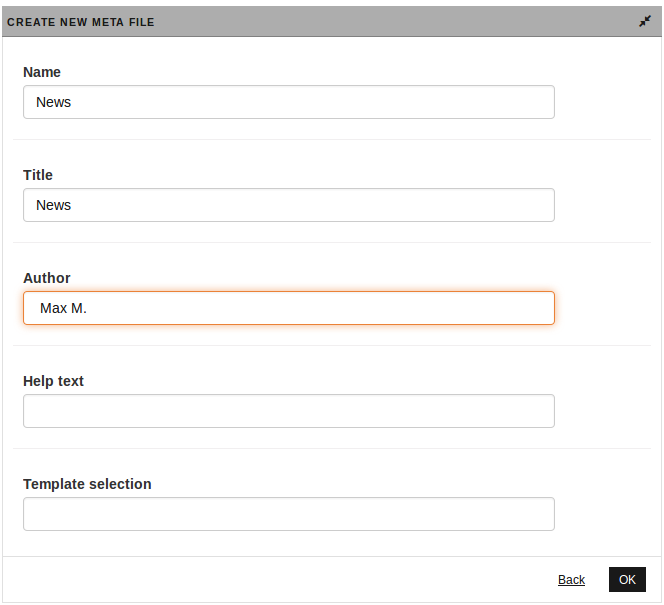
Click on the Create new meta file button. The following dialog opens:
-
Fill the appropriate data in each field. Based on that data imperia generates a new meta file and places it in
/site/metafiles.-
The “Help text” field appears in the Meta-Edit step. In the source code of the meta file it is contained in the assignment
HELPTEXT = "...". -
The “Template selection” field allows to set a range of templates that a user can choose from. Enter a comma separated list of templates, without the file extension. In the source code of the meta file this is contained in the assignment
TEMPLATESELECT
                    "template1, template2, ..."
. If no choice of templates is needed, leave the field empty. In this case, the system uses the template selected in the category settings. For more infromation see Syntax Reference in the programmers manual.
-
-
Click the OK button on the bottom.
Now, the new meta file is in the list and can be edited from there (see Editing Meta Files).
Uploading a New Meta File#
Meta files can also be created outside of imperia with any text editor. For detailed description of the syntax and structure, see Meta Files in the programmers manual.
Note
Note that meta files must be UTF-8 encoded (without BOM).
To include such a file in the system, proceed as follows:
-
Open the meta file manager under Menu->Structure->Meta Files.
-
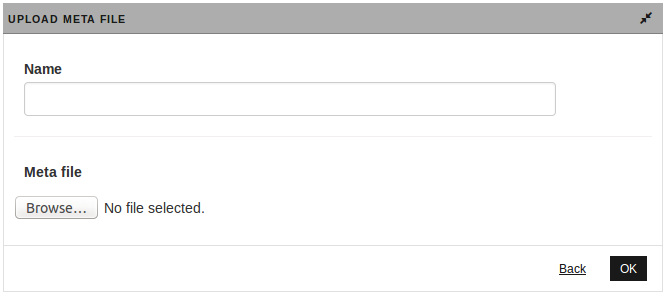
Click on the Upload meta file button. The follwing dialog opens:
-
Fill in the fields with the appropriate data. Browse, using the Browse... button. You can locate a meta file on the file system and enter the path in the appropriate field of the dialog.
-
Click on the OK button at the bottom of the dialog.
The entered file is copied to /site/metafiles and is immediately available on the system.
Editing Meta Files#
Meta files can be edited in the internal editor or another text editor. All meta files are stored in /site/metafiles.
To edit a meta file in the internal editor, proceed as follows:
-
Open the meta file manager under Menu->Structure->Meta Files.
-
Click on the title of the meta file you wish to edit.The meta file will be opened in the internal editor at the end of this page.
The internal editor is described in the chapter The Internal Editor in the user manual.
Tip
The internal editor is also an easy way to “convert” from meta files that have not been created in the UTF-8 character set. Copy the contents of the file to the clipboard, and from there into the editor window. imperia automatically saves the file in Unicode character set.
Deleting Meta Files#
To delete a meta file, proceed as follows:
-
Open the meta file manager under Menu->Structure->Meta Files.
-
Click the icon on the right side is used to delete the corresponding meta file.
- A confirmation dialog pops up, where you need to click the OK button to delete the file or Cancel to abort the deletion.
When deleting the file, the meta file will be deleted in imperia as well as in the directory /site/metafiles.
Templates#
All templates are maintained via the template manager. The template manager has the same settings and permissions as the meta file manager.
To access the template manager go to Menu->Structure->Templates. The following dialog opens:
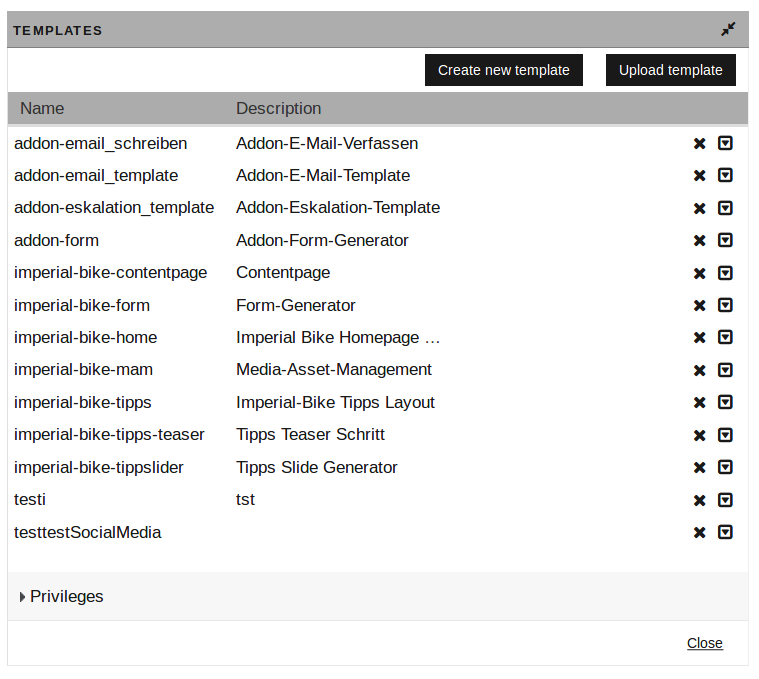
The dialog is divided into three sections:
Links
The top-most section contains the buttons Create new template and Upload template. To learn more about these functions read Creating a new template or Uploading a Template.
File list
This list contains the names (left column) and the descriptions (second column) of all currently configured templates. A click on the row of a template opens the template for editing.
Privileges
This section is collapsed on load. To open it click on the title. It contains the read and modify permissions for all the groups on a system. See also Manage File Permissions in imperia in this chapter.
Creating a New Template#
To create a new template, proceed as follows:
-
Open the template manager as described in Templates.
-
Click on the Create new template button. The following dialog opens:

-
Fill the appropriate data in each field. Based on that data imperia generates a new template and places it in
/site/templates. -
Click on the OK button to save.
The new template is in the list and can be edited from there (see Editing Templates).
Uploading a Template#
Templates can be created with any text editor. Follow these steps to upload an externally created template on your imperia system:
-
Open the template manager under Menu -> Structure -> Templates.
-
Click on the Upload template button. The following dialog opens:
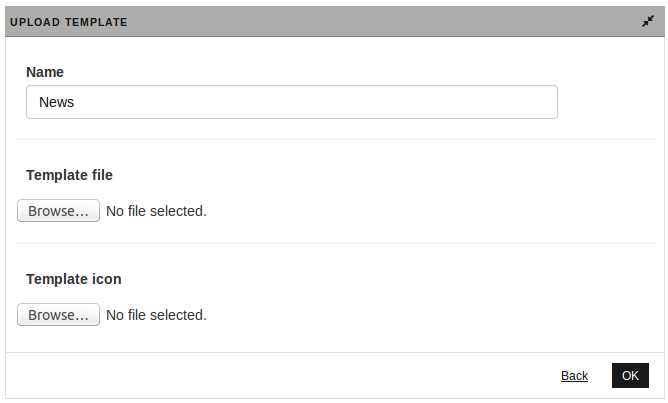
-
Fill in the fields with the appropriate data:
- Template file: Browse, using the Browse... button. You can locate a template in the file system and enter the path in the appropriate field of the dialog.
- Template icon: An image to be displayed in the template selection column can also be defined. Possible fromats are
.jpg/.jpeg,.pngand.gif.The uploaded file is stored in\imperia\images\screenshotswith the name of the template.
-
Click on the OK button at the bottom of the dialog.
The entered file is copied to /site/templates and is immediately available on the system.
Note
Similar to meta files, templates should be created in UTF-8 character set. However, with proper precautions, this is not mandatory.
Editing Templates#
To edit a template, proceed as follows:
-
Open the template manager as described in Templates.
-
Click on the row of the template you wish to edit. It will be opened in the internal editor at the end of this page. In this preview no template code (IF statements, substitutions, Perl code, etc.) is perfromed.
More infromation on the internal editor read the chapter The Internal Editor in the user manual.
Deleting a Template#
To delete a template, proceed as follows:
The Remove icon deletes the corresponding template. 1. Open the template manager as described in Templates.
- Click the Remove icon in the row of the corresponding template.
- A confirmation dialog pops up where you need to confirm the deleting by clicking OK or to abort the deletion, click Cancel .
When deleting the file, the meta file will be deleted in imperia as well as in the directory /site/templates.
Template Reparser#
In imperia you can reparse sites in two ways:
- In the user interface you can reparse single sites/templates with the feature Structure->Template Reparser.
- With a script you can reparse many sites/templates at once.
Reparsing single sites#
With the feature Template Reparser you can reparse modified templates so that all documents created with an older version of the template will be generated again.
Thereby, both documents already published in a target sytem and documents to be published (in the publish list) will be regenerated.
Also, after reparsing you can determine whether the regenerated documents are going to get back into the workflow or to the publish list or to a target system.
In order to use the template reparser, proceed as follows:
-
Go to Structure -> Template Reparser. The page REPARSE SETTINGS opens:
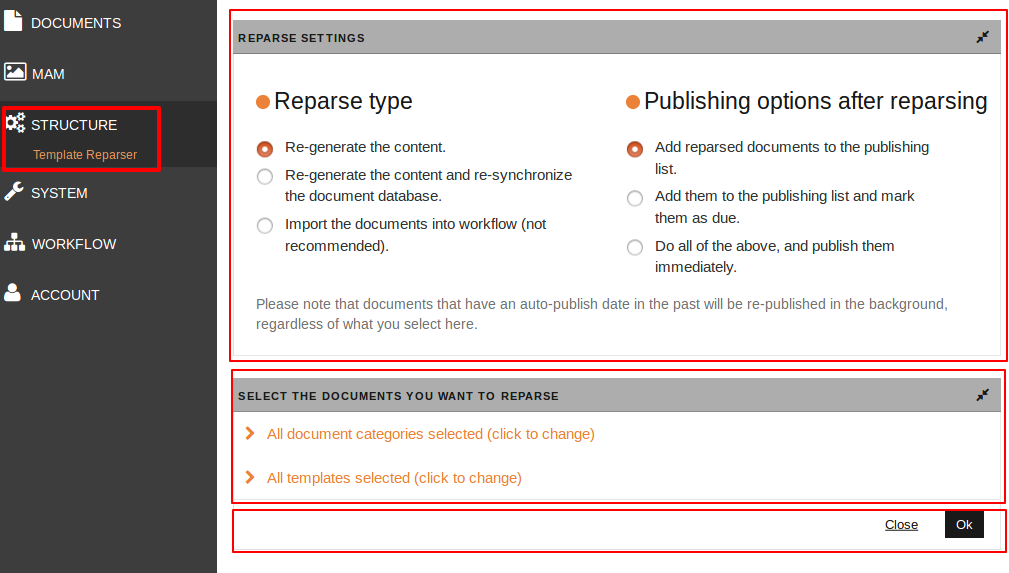
- Reparse settings:Choose one of the 'reparse type' as well as one of the 'publishing options after reparsing'. As shown in the figure, the recommended settings are 'Re-generate the content.' and 'Add reparsed documents to the publishing list.'.
-
Select documents you want to reparse: Per default, all document-categories are selected. This is the standard option as asset-categories are not affected. For more information, please read the box:
Please note
If you select all templates, reparsing could take a long time as many documents have to be regenerated. This can lead to server time-outs and abrupt cancellation of the process.Therefore, in case you want to reparse many sites, proceed as explained in the next chapter 'Reparsing many sites'.
-
Click OK to start the reparsing. During/after reparsing the log is shown about the successfully reparsed documents and possible errors:
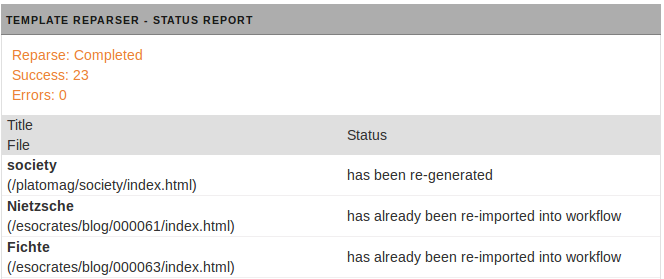
- Click Close, to return to the dashboard.
Reparsing many sites#
The site/bin/xreparse.pl script is available if you need to reparse large websites. There is no imperia interface for that script. This script is more suitable for reparsing large amounts of data than the corresponding, executable in the user interface, functions.
With the help of the script, all documents that are currently in a publishing list or on a target system, are processed. It is assumed that none of these documents are in a workflow. We further recommend to finish the workflow for all documents before running the script.
xreparse.pl ignores Media Asset Management documents, unless this is enforced with the -m option.
Please note
The meta variable publish_date is set in a document with parameter -p and in case the publishing conditions are met, receives a value 2001-01-01 01:01.
To access a list of all the options use the -h option.
Arguments#
By default, the script interprets a list of arguments as a list of template names, the leading template and the htms suffix are not specified. If the -n option is used, the argument list is interpreted as a list of categories' NodeIDs.
The reparse will be limited to the documents that use a template with the defined name and which NodeIDs begin with the specified categories' NodeID.
Example#
This example is for a workflow in which only the first step is interactive and all the rest are not. This allows the reparsed documents to pass through the workflow, without any user intervention.
./xreparse.pl -w -p all -f -e Service Product
This will reparse all documents that were created with Service.htms or Product.htms templates. During the reparse the environment variable is set. There is no additional user input. After the reparse the first workflow step will be carried out. The reparsed documents will be released.
Flex Modules#
In the flex module manager you can edit, delete and create flex modules and upload external flex modules to the imperia system.
To access the flex modules manager use Menu->Structure->Flex Modules.

The following overview opens:
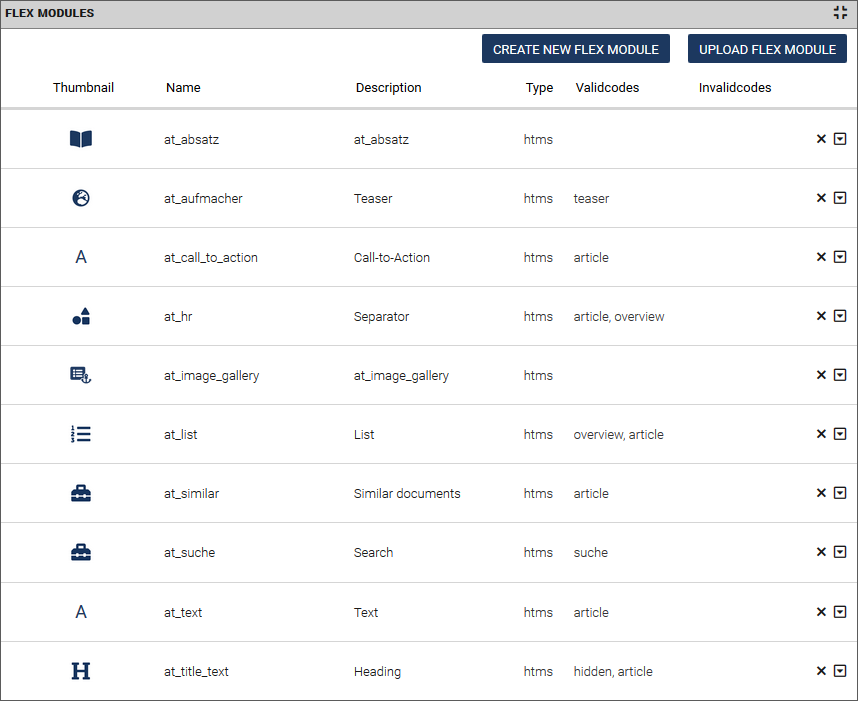
The table shows a list of all the system's flex modules. For each flex module the following information is displayed:
- Thumbnails: This column contains a symbol image for the flex module in thumbnail format.
- Name: The name of the flex module.
- Description: The description from the
DESCRIPTIONfield in the source code of a flex module. - Type: Displays the type of the flex module:
htmsorperl. - Validcodes: This column contains the
VALIDCODESof the corresponding flex module. Read more about validcodes in VALIDCODE=valueand Limiting the Access to Slots and Flex Modules in the programmers' manual. - Invalidcodes: This column contains the
INVALIDCODESof the corresponding flex module. Read more about invalidcodes in VALIDCODE=valueand Limiting the Access to Slots and Flex Modules in the programmers' manual.
Configuring a flex module#
The "Thumbnail" and "Description" properties of a flex module can be set here. They are then displayed in the selection dialog for inserting flex modules:
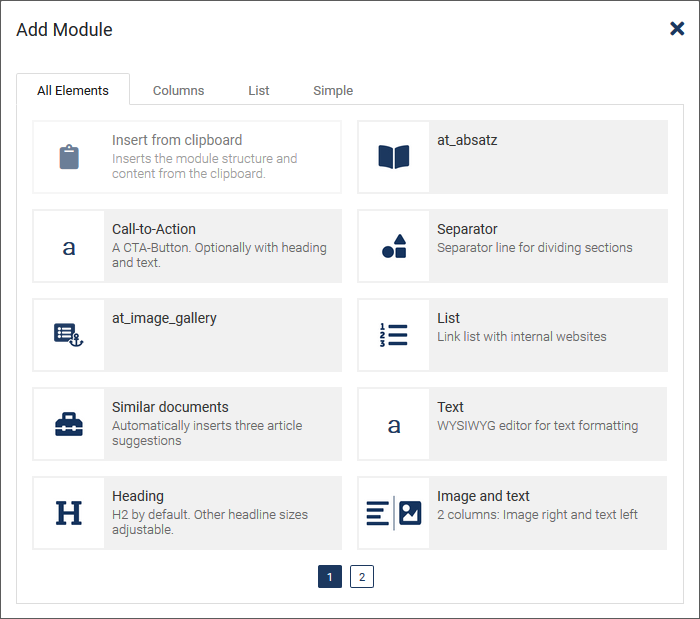
- In the flex modules overview, click on the row of a flex module.
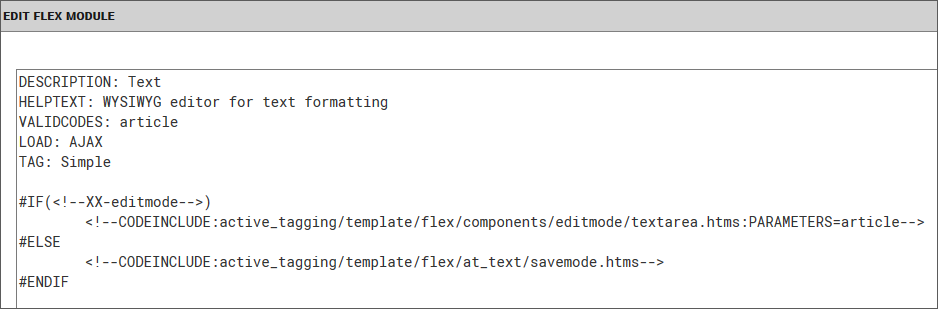
The source code of the Flex module is displayed below the table in the Edit Flex Module area.
-
Give the flex module a description or change the existing description by typing it into the source code of the flex module behind
DESCRIPTION. -
You may want to group several flex modules by type on separate tabs to make selection easier later. In this case specify a key called
TAGin the text editor and give it a name. This will be read out as a tab title in the selection dialog. -
Klicken Sie auf Speichern oder Speichern und Schließen um Ihre Daten zu sichern.
Adding a module icon
- To insert a symbol image for the flex module, choose the More options symbol and Set icon option at the end of a flex module row in the overview.
![]()
- In the system icon overview, select the desired icon.
![]()
-
With Reset Icon the flex module gets back its standard icon given by the system.
-
If you want to give the flex module a user-specific icon, choose Upload Custom Icon.
![]()
- In the Edit Flex Module area that is opened, click on Upload.
![]()
-
Select an image in the file selection window that opens.
-
Click on SAVE or SAVE AND CLOSE to save your data.
Creating a New Flex Module#
To create a new flex module, proceed as follows:
- Open the flex module manager under Menu->Structure->Flex Modules.
- Click on the Create new flex module. The following dialog opens:
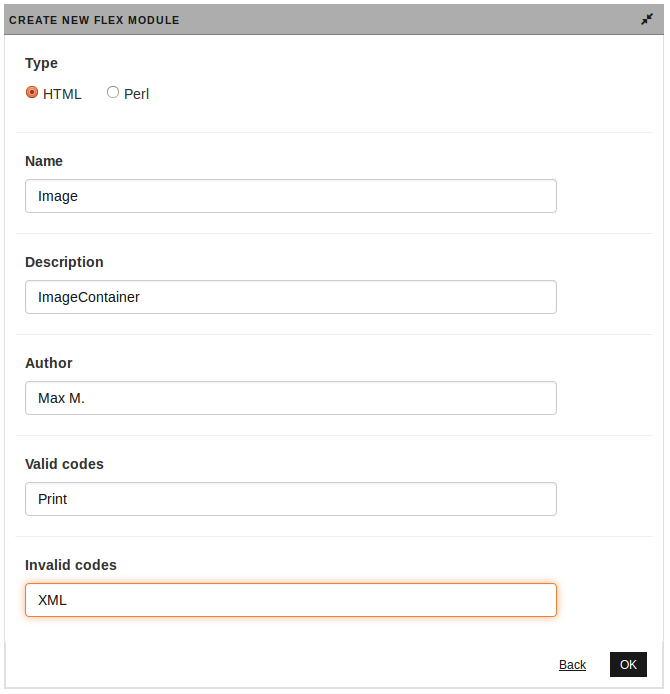
- Enter the appropriate infromation in each field. The fields “validcodes” and “invalidcodes” correspond to the VALID- and INVALIDCODES of a flex module's source code that control the availability of flex modules in templates.
- Click on the OK button to save.
Uploading a Flex Module#
Flex modules can be created outside of imperia with any text editor and uploaded into the system. Proceed as follows:
-
Open the flex module manager under Menu->Structure->Flex Modules.
-
Click on the Upload flex module button. The following dialog opens:
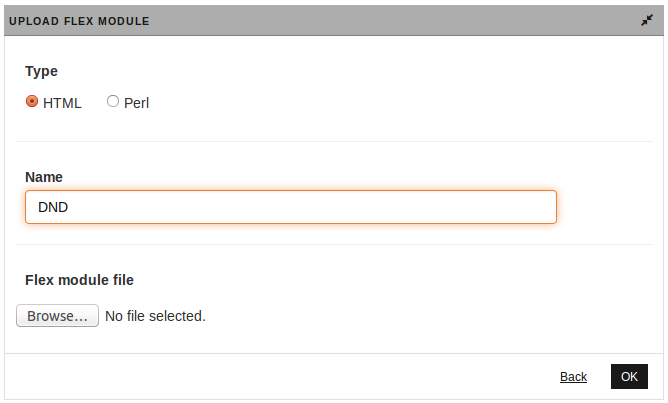
- Fill in the fields with the appropriate data. Browse, using the Browse... button. You can locate a flex module in the file system and enter the path in the appropriate field of the dialog.
- Click on the OK button at the bottom of the dialog.
The entered file is copied to /site/flex and is immediately available on the system.
Note
- If an external flex module is saved in
site/flexwithout uploading it via the dialog described here, it will also appear in the list of flex modules. - Note that flex modules must be created in UTF-8 character set encoding (without BOM).
Editing Flex Modules#
Flex modules can be edited with any text editor. They must be saved under /site/flex with the file extension .htms for HTML flex modules or .perl/.pl for Perl flex modules.
To edit a flex module via imperia's interface proceed as follows:
-
Open the flex module manager under Menu->Structure->Flex Modules.
-
Click on the row of the desired flex module. This will open the internal editor at the end of this page. More infromation on the internal editor in the chapter The Internal Editor in the user manual.
- Edit the flex module and save the changes.
Deleting a Flex Module#
To delete a flex module proceed as follows:
- Open the flex module manager as described in Flex Modules.
- Click the Remove icon .
- A confirmation dialog pops up, where you need to confirm the deleting by clicking OK or to abort the deletion, click Cancel.
The flex module is deleted from the list and from the /site/flex directory.
Slot Modules#
All slots are maintained via the slot modules manager. Like flex modules, slot modules can be edited, deleted, created and uploaded from the file system onto imperia through the dialog.
Note
For details on the syntax and application of slot modules, see Flex Modules and Slot Modules in the programmers' manual.
To access the slot modules manager go to Menu->Structure->Slot Modules. The following dialog opens:
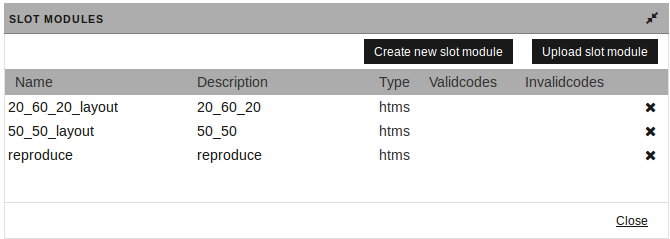
The dialog shows a list of all the system's slot modules. For each slot module the following infromation is displayed:
| Name | Description | Type | Validcodes | Invalidcodes |
|---|---|---|---|---|
| This column contains the name of a slot module. | This column contains the description from the DESCRIPTION field in the source code of a slot module. |
Displays the type of the slot module - htms or perl. |
This column contains the VALIDCODES of the corresponding slot module. Read more in validcodes in VALIDCODE=value and Limiting the Access to Slots and Flex Modules in the programmers' manual. |
This column contains the INVALIDCODES of the corresponding slot module. Read more in invalidcodes in VALIDCODE=value and Limiting the Access to Slots and Flex Modules in the programmers' manual. |
Furthermore, there are buttons to upload and create slot modules, as well as to delete them.
Creating a New Slot Module#
To create a slot module, proceed as follows:
- Open the slot modules manager under Menu->Structure->Slot Modules.
- Click on the Create new slot module button. The following dialog opens:
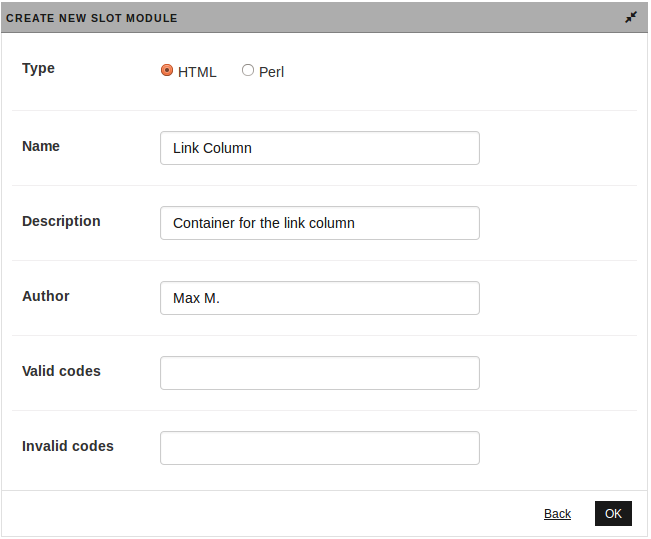
- Enter the appropriate infromation in each field. The fields “validcodes” and “invalidcodes” correspond to the VALID- and INVALIDCODES of a slot module's source code that control the availability of slot modules in templates.
- Click on the OK button to save or Back to exit without saving.
Uploading a Slot Module#
Slot modules can be created outside of imperia with any text editor and uploaded into the system. Proceed as follows:
-
Open the slot modules manager under Menu->Structure->Slot Modules.
-
Click on the Upload slot module button. The following dialog opens:
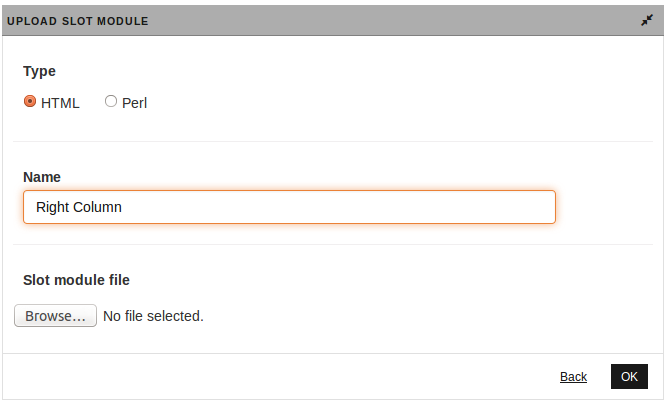
- Fill in the fields with the appropriate data. Browse, using the Browse... button. You can locate a slot module in the file system and enter the path in the appropriate field of the dialog.
- Click on the OK button at the bottom of the dialog.
The entered file is copied to /site/slot and is immediately available on the system.
Note
-
If an external slot module is saved in
site/slotwithout uploading it via the dialog described here, it will also appear in the list of slot modules. -
Note that the slot modules must be created in UTF-8 character set encoding (without BOM).
Editing Slot Modules#
Slot modules can be edited with any text editor. They must be saved under /site/slot with the file extension .htms for HTML slot modules or .perl/.pl for Perl slot modules.
To edit a slot module via imperia's interface proceed as follows:
-
Open the slot modules manager under Menu->Structure->Slot Modules.
-
Click on the row of the desired slot module. This will open the internal editor at the end of this page. More infromation on the internal editor in the chapter The Internal Editor in the user manual.
- Edit the slot module and save your changes.
Deleting a Slot Module#
To delete a slot module, proceed as follows:
- Open the slot module manager under Menu->Structure->Slot Modules.
- Click the Remove icon in the corresponding row of the slot module.
- A confirmation dialog pops up, where you can click the OK button to delete the file or Cancel to abort the deletion.
The slot module is deleted from the list and from the /site/slot directory.
Codeincludes#
Codeincludes are also stored in separate files and can be added, edited and managed as other modules via imperia's UI. You can also upload code snippets, you have created outside imperia.
More about codeincludes read in Codeinclude in the programmers' manual.
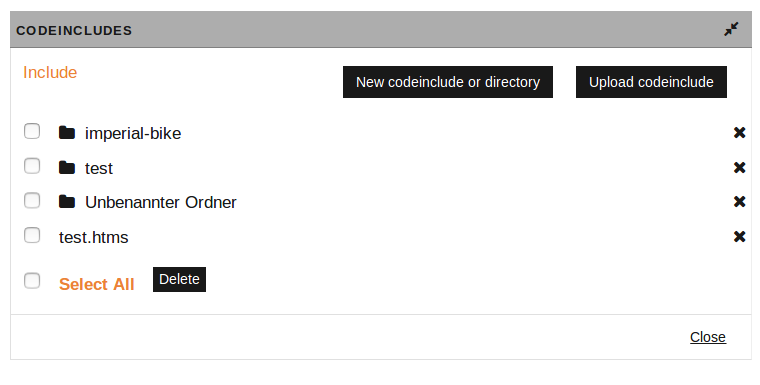
To access the codeincludes manager go to Menu->Structure->Codeincludes. The following dialog opens:
-
There, you get an overview of the files in the directory
site/includeof your development system. -
For better arrangement, you can structure your codeincludes in subdirectories, as shown above. Directory names are displayed in bold in the list.
-
Click on a folder name to display its contents as a file list, see following figure:
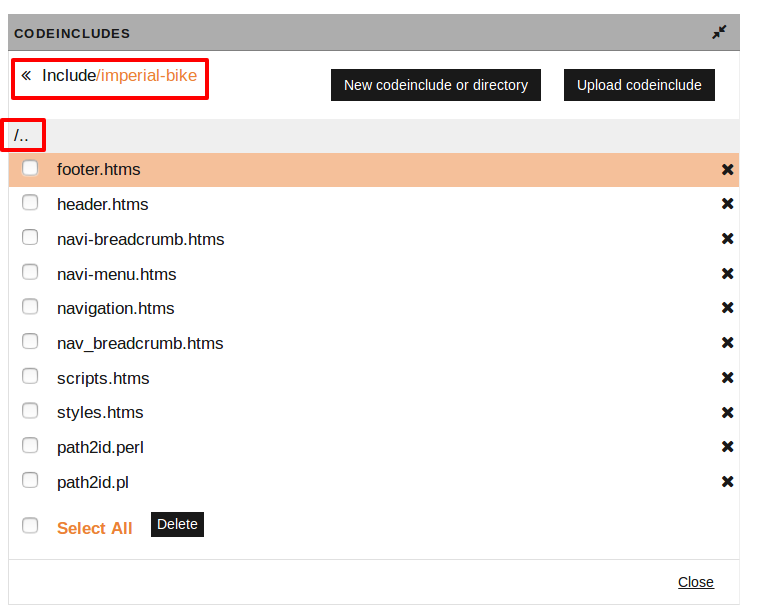
- If you are in a subdirectory, the first entry in the list is always a link to the upper directory level. This link is identified by two points.
- Filenames are displayed in full, including the file extension.
Creating a New Codeinclude/Directory#
To create a new codeinclude or directory, proceed as follows:
-
Open the codeincludes manager under Menu->Structure->Codeincludes.
-
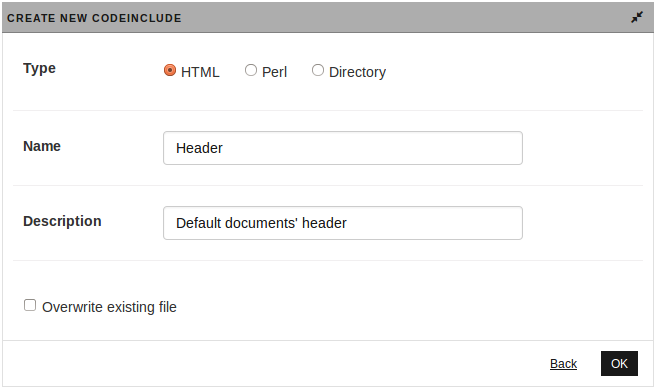
Click on the New codeinclude or directory button. The following dialog opens:
-
Use the radio buttons to choose whether you want to create an
HTMLorPerlcodeinclude or simply a directory.Note
imperia automatcally adds the file extensions for the codeincludes, so they can be omitted when entering the name.
-
Enter the Name and a short Description in the corresponding fields.
-
Save the changes with the OK or discard them with the Back button. If the entered name already exists, a warning message appears as soon as the changes are confirmed with OK. In this case the name should be changed or the files may be overwritten by checking the checkbox Overwrite existing file.
Note
Directories cannot be overwritten in this way, preventing file loss.
After you have saved your changes you will be returned to the codeincludes manager and the newly created file will be available in the list.
Uploading Codeincludes#
Codeincludes can be created outside of imperia with any text editor and uploaded into the system. Proceed as follows:
-
Open the codeincludes manager under Menu->Structure->Codeincludes.
-
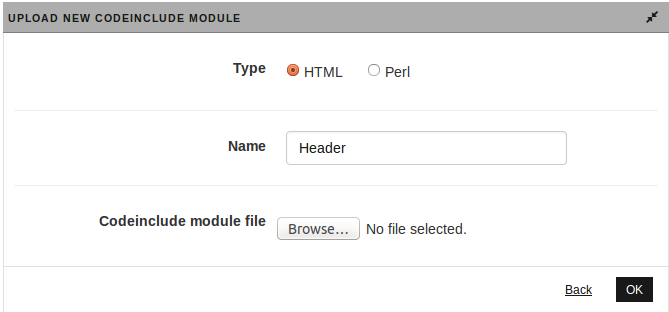
Click on the Upload codeinclude button. The following dialog opens:
-
Determine the file type to be uploaded by selecting one of the radio buttons. The available types are
HTMLandPerl. Depending on the selection imperia automatically appends the appropriate file extension to the file name. -
Enter the Name in the corresponding field.
-
Use the Browse ... button to search for the desired file in the file system.
-
Confirm the changes with the OK button or cancel them with the Back one. If a codeinclude file with the same name already exists, the upload is cancelled. There is again an option to change the name or overwrite an existing file.
After uploading the file, you are returned to the codeincludes manager and the newly uploaded file is available in the list.
Editing Codincludes#
Codeincludes can be edited via imperia's UI:
-
Go to the codeinclude manager under Menu->Structure->Codeincludes.
-
Click on the title of the desired codeinclude. This will call imperia's internal editor, where you can edit the codeinclude.
- Save your changes.
Deleting Codeincludes/Directories#
To delete a codeinclude or a directory, proceed as follows:
- Open the codeinclude manager under Menu->Structure->Codeincludes.
- Click the Remove icon at the end of the corresponding row of the codeinclude.
- If you wish to delete more codeincludes or directories, first select them via the checkboxes in front of the names and click the Delete button.
Manage File Permissions in imperia#
imperia offers the ability to edit the permissions to templates and meta files. There are two ways to assign the permissions write, delete or read:
a) by selecting certain or all groups for a certain template or meta file or b) by modifying or setting privileges of certain or all groups for a certain or all templates or meta files.
In order to assign the rights create, upload or delete to the modules mentioned in this chapter, read Controller Permissions in this manual.
The following steps below are described for meta files as an example. For templates, the steps are the same.
a) To assign permissions to single files, proceed as follows:
-
Open the meta file manager under Menu->Structure->Meta Files.
-
In the row of the desired file, click the menu where the Chmod function is available.
- Click Chmod to open the ACL dialog of the selected file:
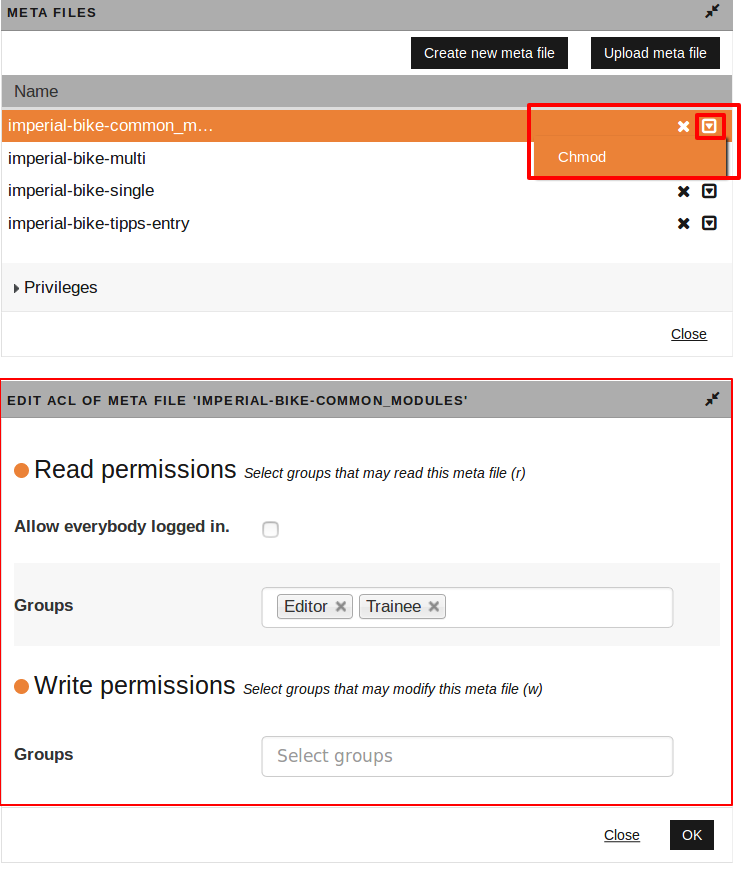
- Read permissions: select the desired group(s) or Allow everybody logged in. to read this certain file.Write permissions: select certain groups to write this meta file.
- By clicking OK you save your changes and return to the manager.
b) To modify or set priviliges to all files, proceed as follows:
- Open the meta file manager under Menu->Structure->Meta Files.
- Click on the link Privileges. The following dialog opens:
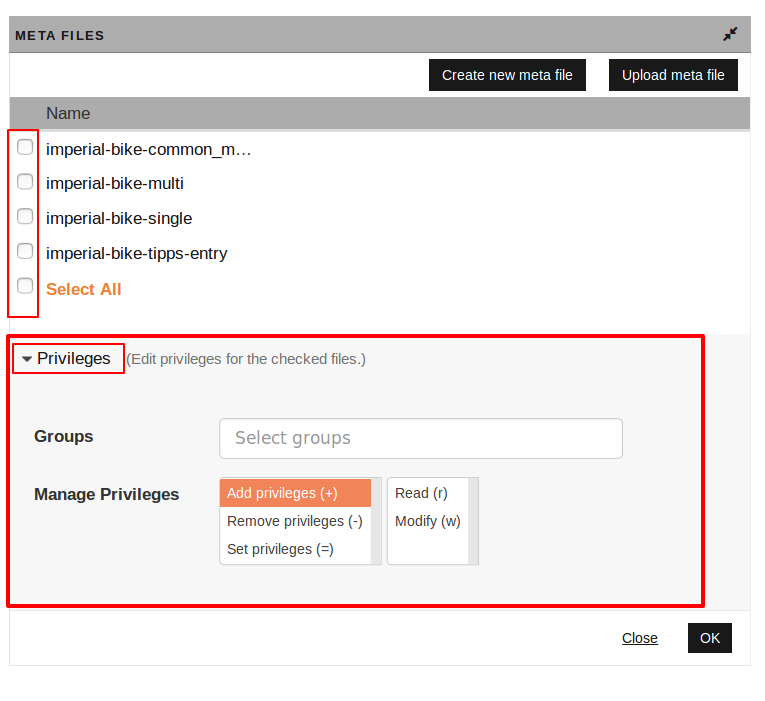
- Select the desired files(s) or Select All.
- Groups: Select the group(s) whose permissions are to be modified or set.
-
Manage Priviliges:
-
Select the function:
- Add privileges (+): This function adds the selected permissions to the existing ones of selected groups.
- Remove privileges (-): This will remove the selected permissions from selected groups.
- Set privileges (=): This function sets the permissions of selected groups to the selected privileges. Unmarked privileges are removed.
-
Select the specific privileges read/write that are to be changed or adjusted.
-
-
Click OK to save your settings and return to the manager.